🔔📣 Attention All Developers!
Welcome, brave souls, to the Notification Nexus of Laravel Land! Buckle up as we embark on a thrilling journey through the world of notifications - the unsung heroes of your application’s communication system.
💣 Creating Notifications: It all starts here, with the ignition of your notification engines. You’ll learn how to craft and customize these little powerhouses to suit your every need.
🚀 Blasting Off! With notifications armed and ready, it’s time to deploy them to the recipient’s device of choice. Whether using the powerful Notifiable Trait or the Notification Facade, we got you covered. But wait, there’s more! We’ll explore delivery channels, queueing, on-demand notifications, and even customizing each message for an unforgettable user experience.
📧 Email Mayhem: Master the art of formatting mail messages, customizing the sender, recipient, subject, and more. Dive into the world of templates, attachments, tags, metadata, and Symfony Messages. We’ll also introduce you to Mailables and show you how to preview your notifications before they go live.
📝 Markdown Madness: Get a grip on generating and writing Markdown messages, with customizable components for a one-of-a-kind user experience.
🏋️♂️ Database Dodges: Ready to store your notifications in the database? We’ll guide you through the prerequisites, formatting, accessing, and even marking notifications as read.
📢 Broadcast Bonanza: Learn how to format broadcast notifications and listen for them like a pro. We’ll walk you through the prerequisites, formatting, and listening strategies for an engaging user experience.
📱 SMS Smash: Customize “From” numbers, add client references, and route SMS notifications with ease. Get ready to conquer the world of text messaging!
🚀 Slack Soiree: Format Slack notifications, explore interactivity options, and learn how to route them to different workspaces. It’s time to bring your application’s communication game to the next level!
🌍 Localization Level-up: Translate your notifications for a truly global impact. Let’s make sure every user feels at home in Laravel Land.
🔬 Quality Assurance: Testing is crucial, and we’ll show you how to ensure your notifications are always on point.
📅 Notification Events: Understand the lifecycle of a notification and learn how to hook into it for even more customization possibilities.
🎨 Custom Channels: Take control of your notifications by creating your own channels. The possibilities are endless, and we’re here to help you unleash them!
Greetings, fellow space cowboy! Laravel ain’t just about whipping up those tasty emails (check out our mail tutorial over yonder), no siree! This here horse is packed with a whole posse of tricks, including sending notifications across multiple delivery channels faster than you can say “Howdy partner!”
We’re talkin’ email, SMS via Vonage (formerly known as Nexmo – hey, even cowboys need a rebrand every now and then), and Slack. But that ain’t all! Thanks to our friendly community, there are more notification channels than tumbleweeds in the desert, each one capable of delivering messages over dozens of different channels.
Now, if you’re looking for a new sheriff in town, check out these here community-built notification channels.
Notifications are usually short, sweet messages that let your users know something’s happened in your application—kind of like the town crier but with less yelling and more technology. For example, if you’ve got a billin’ app, you might send an “Invoice Paid” notification to your users via email and SMS channels.
And now for the good part: Generatin’ notifications!
Just like how cowboys corral their herd, Laravel helps you gather ‘em all together with a simple Notification class. You can then send ‘em out using various delivery channels. It’s as easy as saddlin’ up and ridin’ off into the sunset! But remember, keep it short, informative, and cowboy-approved. Yeehaw!
Unleashing Notifications in Laravel Land! 🔔🚀
In this fantastical world we call Laravel, every notification is like a magical messenger, each one embodied by a grandiose class that resides regally in the app/Notifications ballroom. Fear not if you can’t find this palace in your app – it’ll be constructed faster than you can say “Hasta la vista, cobweb corner!” with the wave of a magical Artisan wand:
php artisan make:notification InvoicePaidJust like that, a sparkling new notification class will materialize in your app/Notifications ballroom. Each of these notifications comes armed with a via method and a smorgasbord of message crafting methods, such as toMail or toDatabase, that alchemize the notification into a customized message suitable for each unique channel.
Time to send those notifications! 📮🎉
Now that your notifications are all dressed up, let’s show them off! To send your custom notifications out into the wild, you need a little help from your application’s App\Providers\EventServiceProvider. Here, you’ll find a list of event listeners that can be used to dispatch your notifications when specific events occur.
To add your freshly baked notification to this event listener soiree, you’ll want to:
- Register the
Notificationclass with the$listenproperty in yourEventServiceProvider. - In the same file, add a new method for the event that should trigger your notification.
- Inside this new method, use the conveniently provided
event(...)function to broadcast the event. - Lastly, dispatch your notification using the
notify()method with an instance of the event.
And just like that, you’ve got a well-dressed messenger making its way to the recipient of your choice! 🌈✨
Ring-a-Ding-Ding! The Art of Senderology in Laravel Land
Ahoy there, coderino amigos! Ever wanted to summon your users like a modern-day Merlin, but with less wand-waving and more code? Well, buckle up, buttercup, because we’re about to embark on an enchanting journey into the mystical world of notifications in Laravel Land!
The Notifiable Trait: Your Magical Amulet
In this fantasy, our hero (you) will need a trusty companion to help cast the spell. Enter the “Notifiable” trait - your magical amulet that empowers any model to receive notifications! To equip this trait, simply extend the \Illuminate\Notifications\Notifiable class in your Model.
use Illuminate\Notifications\Notifiable;

class User extends Authenticatable {
    use Notifiable;
}
Now that our hero has donned their magical amulet, they’re ready to harness its powers!
Next up, let’s summon the notification channels - the paths through which our enchanted messages shall travel.
The Channels: The Royal Post Office of Notifications
TheNotificationChannels are the trusted postmen of Laravel Land, delivering your messages to the appropriate realms (err… channels). To add a new channel, simply create or register a service provider for the desired notification channel. For example, if you’d like to send email notifications, the Mail channel is your best bet:
use Illuminate\Support\ServiceProvider;
use NotificationChannels\Mailgun\MailgunChannelServiceProvider;

class AppServiceProvider extends ServiceProvider {
    public function register() {
        if ($this->app->environment('local', 'testing')) {
            $this->app->register(MailgunChannelServiceProvider::class);
        }
    }
}
Remember to configure your Mailgun API keys in the .env file:
MAILGUN_DOMAIN=your-mailgun-domain.com
MAILGUN_SECRET=your-mailgun-secret
And voilà! With the channels set up, you can now craft your enchanted messages using Notification classes.
Crafting Your Enchantments: The Art of Notification Creation
Notification creation is an art form, dear coderino amigos! To conjure up a custom notification, simply create a new class extending the \Illuminate\Notifications\Notification base class. Here’s an example for a welcome notification:
use Illuminate\Bus\Queueable;
use Illuminate\Contracts\Queue\ShouldQueue;
use Illuminate\Notifications\Messages\MailMessage;
use NotificationChannels\Mailgun\MailgunChannel;

class WelcomeNotification extends Notification implements ShouldQueue
{
    use Queueable;

    protected $greeting;

    public function __construct($greeting)
    {
        $this->greeting = $greeting;
    }

    public function via(Notification $notifiable)
    {
        return [MailgunChannel::class];
    }

    public function toMail($notifiable)
    {
        return (new MailMessage)
                    ->line('Greetings!')
                    ->line($this->greeting)
                    ->action('Login', url('/login'))
                    ->line('Thank you for joining us!');
    }
}
Finally, to dispatch your enchantment (notification), simply call the notify() method on a user:
$user = User::find(1);
$user->notify(new WelcomeNotification('Welcome to Laravel Land!'));
And there you have it, dear coderinos! With just a few spells and enchantments, you’ve successfully sent your first notification in Laravel Land. Now go forth and spread the magic of notifications across your kingdom! 🎩✨
Alrighty then! Let’s dive into the whirlpool of notifications, shall we? In this Laravel world, there are two ways to send a message: either by using the notify method of the oh-so-charming Notifiable trait or by summoning the mighty Notification facade (that’s fancy talk for magic spells).
By default, your application’s App\Models\User model is adorned with this enchanting trait:
<?php

namespace App\Models;

use Illuminate\Foundation\Auth\User as Authenticatable;
use Illuminate\Notifications\Notifiable; // *Twinkles*

class User extends Authenticatable
{
    use Notifiable;
}
The notify method, which comes with the trait, is a picky little thing – it prefers notification instances as its date for the evening:
use App\Notifications\InvoicePaid;

$user->notify(new InvoicePaid($invoice)); // *Pop goes the cork*
Now, hold your horses! Just because it’s on your User model doesn’t mean it has to stay there. You can share the love with any of your models, if you’re feeling generous:
[!NOTE] Don’t be shy, spread that Notifiable trait around like confetti at a wedding (but please clean up afterwards).
Alright, buckle up, coding cowboys and cowgirls! If you’re tired of wrangling notification logic like a wild mustang, let the Notification facade be your trusty sidekick!
This handy dandy tool is perfect when you need to round up a posse of notifiable entities, say a herd of users, and send ‘em a missive. To rope them in and deliver the message with the help of the facade, just gather all your notifiable entities and the notification instance, then lasso ‘em together and holler at the send method:
use Illuminate\Support\Facades\Notification;

Notification::send($users, new InvoicePaid($invoice));
Now, if you’re in a rush to get that message across the prairie faster than an unbroken colt, you can use the sendNow method. This quick-draw method will shoot your notification off into the ether, even if it’s wearing a ShouldQueue holster:
Notification::sendNow($developers, new DeploymentCompleted($deployment));And for those of you who like to tinker with your delivery methods, the facade lets you customize your message’s journey. Saddle up and follow the trail to specifying delivery channels!
Channel Surfin’ Notifications, Laravel Style! 🌴📧🔥💬📱
In the world of Laravel, notifications aren’t just a friendly heads-up - they’re a multi-channel party! Every notification class comes equipped with a via method, acting as our VIP pass to decide where the celebration takes place. The dance floor can be the mail, database, broadcast, vonage, or even the hip and trendy slack channel.
[!WARNING] If you’re feeling extra social and want to invite Telegram or Pusher to the party, don’t forget to check out the groovy Laravel Notification Channels website (http://laravel-notification-channels.com). Remember, more friends equals more fun! 🎉🎊
The via method is like the bouncer at the door - it takes a $notifiable instance, which is the guest of honor receiving the invitation. You can use this VIP to decide who gets on which dance floor:
/**
 * Pick the notification's delivery channels.
 *
 * @return array<int, string>
 */
public function via(object $notifiable): array
{
    if ($notifiable->is_a_sms_lover()) { // 📱🤘
        return ['vonage'];
    } else { // 💌🔥💬💻
        return ['mail', 'database'];
    }
}
Queue up the Fun, Laravel Style! 🎧🕺
When the party gets too hot and the dance floor’s about to burst, it’s time to queue some notifications! Use the shouldQueueOn method to delegate tasks and keep the good times rolling while your app takes a much-needed break. 💆♂️🍻
/**
 * Get the event's connection name for queueing database events.
 *
 * @return string|null
 */
public function getConnection()
{
    return 'database'; // Time to queue up those notifications! 🎧🕺
}
The Art of Time Management: Queueing Notifications
(Caution Tape Warning)
Before you leap into the world of queueing notifications, remember to first set up your queue and summon your minions, a.k.a start a worker.
Sending notifications can be as slow as a sloth on a sugar high, especially if the messenger has to make an awkward dance with an external API to deliver your message. To speed up your application’s response time, give your notification the gift of patience by adding the ShouldQueue interface and the magical Queueable trait to your class. These enchanted artifacts are already in your inventory when you cast the make:notification spell, so feel free to equip them on your notification class:
<?php

namespace App\Notifications;

use Illuminate\Bus\Queueable as QueueableBus;
use Illuminate\Contracts\Queue\ShouldQueue as ShouldQueueContract;
use Illuminate\Notifications\Notification as BaseNotification;
use QueueableBus; // In case you're feeling nostalgic for medieval spells

class InvoicePaid extends BaseNotification implements ShouldQueueContract
{
    use QueueableBus; // Don't forget your cape!

    // ...
}
Once the ShouldQueue interface has been added to your notification, you can send it like a pro. Laravel will spot the ShouldQueue interface on your class and automatically queue the delivery of your message:
$user->notify(new InvoicePaid($invoice));When queueing notifications, a new job is created for each recipient-channel combo. So, if your notification has three recipients and two channels, you’ll have six jobs ready to be dispatched to the queue like an army of messengers!
Now, if you want to delay sending a specific notification, you can use the delayUntil method:
$user->notify(new InvoicePaid($invoice)->delayUntil(now()->addMinutes(10)));In this example, the InvoicePaid notification will not be sent until 10 minutes have passed! Now you can keep your users waiting with bated breath or simply avoid bothering them during their favorite TV show. Just remember to balance patience with consideration!
Ahoy there, Laravel mates! Ever found yourself in a pickle, trying to time your notifications like a pirate on shore leave? Well, fret no more, me hearties! We’ve got a swashbuckling solution for ya.
Setting Sail Later: Delayed Notifications
If you’re hankering to postpone the delivery of your notifications, ye can chain the delay method onto yer notification instantiation like so:
$delay = now()->addMinutes(10);

Avast! Let's notify that user with this InvoicePaid business ($invoice), but let's delay it till $delay:

$user->notify((new InvoicePaid($invoice))->delay($delay));
If ye be wanting to specify a different delay for certain channels, no problem! Just pass an array to the delay method like this:
$user->notify((new InvoicePaid($invoice))->delay([
    'mail' => now()->addMinutes(5),
    'sms' => now()->addMinutes(10),
]));
Or, if ye be fancy and like things customized, ye can define a withDelay method on yer notification class itself. The withDelay method should return an array of channel names and delay values:
/**
 * Set the notification's delivery delay according to yer whimsy.
 *
 * @return array<string, \Illuminate\Support\Carbon>
 */
public function withWhimsy(object $notifiable): array
{
    return [
        'mail' => now()->addMinutes(5),
        'sms' => now()->addMinutes(10),
    ];
}
Yarr, beware the anchors! Customizing the notification queue connection is a bit more advanced, but if ye be curious, read on:
Caution: Advanced Pirate Territory Ahead!
If ye fancy customizing the notification queue connection, ye can do so by using the Notifiable trait’s viaQueue method. Here’s how:
use Illuminate\Notifications\Notifiable;

class User extends Authenticatable implements MustVerifyEmail
{
    use HasApiTokens, Notifiable;

    protected $queue = 'custom_notifications';

    public function viaQueue($notifiable)
    {
        return ['mail', 'sms']; // Or your custom queue name instead
    }
}
Now, when ye send a notification with this User model, it will be sent through the custom_notifications queue. Keep an eye on yer ships, matey! Happy notification sailing! 🐘✨
Alright, let’s get this queue party started! By default, Laravel’s notifications are as chilled as a cucumber in the fridge – they just hang out in your app’s main queue connection. But what if you want to switch things up and serve ‘em up at a different disco? No worries, buddy, we got ya covered!
You can specify a more enticing queue connection for a particular notification by summoning the onConnection method like a modern-day dance floor DJ in your notification’s constructor. Here’s how it goes down:
<?php

namespace App\Notifications;

use Illuminate\Bus\Queueable;
use Illuminate\Contracts\Queue\ShouldQueue;
use Illuminate\Notifications\Notification;

class InvoicePaid extends Notification implements ShouldQueue
{
    use Queueable;

    /**
     * Create a new notification instance.
     */
    public function __construct()
    {
        $this->switchToTheRedisConnection(); // Imagine the disco lights!
    }
}
If you’re feeling extra fancy and want to set up different queue connections for each of your notification channels, we’ve got a killer move called viaConnections. This method is like the ultimate playlist that pairs each channel with its perfect queue connection. Here’s what it looks like:
/**
 * Determine which dancefloors should be used for each notification channel.
 *
 * @return array<string, string>
 */
public function viaConnections(): array
{
    return [
        'mail' => 'disco_lights', // Cue the email invites!
        'database' => 'chill_lounge', // Let's get down to business... literally.
    ];
}
Now, let’s groove those notifications across different queue connections and watch the fun times roll in! 🕺️💃️🎶
Alright, buckle up, notifications are about to get a whole lot more organized! 🚀
If you’ve ever felt like your Laravel notifications were as chaotic as a kindergarten playground, we’ve got the solution for you. Say goodbye to the wild west of notification delivery and welcome to the smooth, well-oiled machine that is Customized Notification Channel Queues! 🎉
So how does it work? Simple! If you want to ensure each notification channel gets its very own delivery lane, all you have to do is whip up a viaQueues method in your notification. This little helper will return an array of channel names and their respective queue names:
/**
* Decide which queues should get the popcorn and soda for each notification channel.
*
* @return array<string, string>
*/
public function viaQueues(): array
{
return [
'mail' => 'mail-queue', // Imagine the postman running with this! 🐨🏃♂️
'slack' => 'slack-queue', // While Slack bots are chillin' in their own private queue. 🤖💫
];
}By using this method, you can give your notifications the VIP treatment they deserve and ensure that everyone gets their message on time! 📣🕰️
Alrighty, let’s dive into the whimsical world of Laravel notifications! Who knew queueing messages could be so thrilling? 🥳
🎓 First off, you can customize the behavior of your queued jobs by adorning your notification classes with some fancy attributes. These attributes will dance their way into the underlying queued job that sends the notification:
<?php

namespace App\Notifications;

use Illuminate\Bus\Queueable;
use Illuminate\Contracts\Queue\ShouldQueue;
use Illuminate\Notifications\Notification;
use Illuminate\Queue\Attributes\MaxExceptions; // 🎉 Let's party for three times!
use Illuminate\Queue\Attributes\Timeout; // ⏰ Don't keep us waiting, it's a long night ahead.
use Illuminate\Queue\Attributes\Tries; // 🎯 Aim for the bullseye... or the fifth try, whichever comes first.

#[Tries(5)]
#[Timeout(120)]
#[MaxExceptions(3)]
class InvoicePaid extends Notification implements ShouldQueue
{
    use Queueable; // 📫 We're all set and ready to queue!

    // ...
}
Want to keep your notifications as secretive as a magician’s card tricks? Add the ShouldBeEncrypted interface to your notification class and watch it become an encrypted, top-secret affair:
<?php

namespace App\Notifications;

use Illuminate\Bus\Queueable;
use Illuminate\Contracts\Queue\ShouldBeEncrypted; // 🔐 Shh! It's a secret to everybody but the intended recipient.
use Illuminate\Contracts\Queue\ShouldQueue;
use Illuminate\Notifications\Notification;

class InvoicePaid extends Notification implements ShouldQueue, ShouldBeEncrypted
{
    use Queueable; // 📫 We're all set and ready to queue!

    // ...
}
But wait, there’s more! You can also define backoff and retryUntil methods to specify the dance moves for the queued notification job:
use DateTime;

/**
 * How long should we twirl before trying again? 🕺️
 */
public function backoff(): int
{
    return 3;
}

/**
 * When should our grand finale end? 🌟
 */
public function retryUntil(): DateTime
{
    return now()->plus(minutes: 5); // That's enough to grab some popcorn and watch the show unfold.
}
[!NOTE] For more details on these job attributes and moves, please check out the documentation on queued jobs.
Ah, the Queued Notification Middleware – the unsung hero of your Laravel app’s party! You see, just like how some people need a wingman to shine at social events, notifications need middleware to make their delivery smoother and more efficient. And who doesn’t love efficiency?
Queued notifications can now bring their own wingman – middleware, that is. Much like queued jobs, they too can arm themselves with this helpful buddy! To get started, whip up a middleware method on your notification class. This method will receive two delightful variables: $notifiable and $channel, which give you the power to customize the returned middleware based on where the notification is headed:
Use yer ol' dependable RateLimited pal!

/**
 * Find out which middleware should accompany our dashing notification job.
 *
 * @return array<int, object>
 */
public function middleware(object $notifiable_darling, string $channel)
{
    // Channel match-making time!
    switch ($channel) {
        case 'mail':
            // Ah, a classic choice! Introduce RateLimited (postmark).
            return [new RateLimited('postmark')];

        case 'slack':
            // Slack's the place to be for quick and casual comms. Let's invite RateLimited (slack)!
            return [new RateLimited('slack')];

        default:
            // No middleware needed for this one, they can just wing it solo!
            return [];
    }
}
And if you want to learn more about queued notifications and database transactions, well, we won’t keep you in the dark anymore. Just click the link below! (But only when you’re ready to deepen your relationship with middleware, of course.)
Learn about queued notifications and database transactions here!
Alrighty, let’s get this queued notification party started! 🎉🥳
First off, it’s important to note that when you dispatch notifications within a database transaction, they might hop the queue before the transaction has officially tied the knot (committed). This means any updates you made during the transaction might still be in limbo, like that unfinished jigsaw puzzle on your coffee table. And any models or records created during the transaction could have vanished faster than a donut at a dietitian’s convention!
If your queue connection’s after_commit option is set to ‘false’, don’t worry—you can still make sure your queued notification is dispatched after all open transactions have been sealed with a kiss (committed). Just call the afterCommit method when you send the notification:
use App\Notifications\InvoicePaid;

$user->notify((new InvoicePaid($invoice))->afterCommit());
Or, if you’re feeling extra eager, you can call the afterCommit method from your notification’s constructor:
<?php

namespace App\Notifications;

use Illuminate\Bus\Queueable;
use Illuminate\Contracts\Queue\ShouldQueue;
use Illuminate\Notifications\Notification;

class InvoicePaid extends Notification implements ShouldQueue
{
    use Queueable;

    /**
     * Create a new notification instance.
     */
    public function __construct()
    {
        $this->afterCommit();
    }
}
But remember, if you want to learn more about how to handle these situations like a boss, be sure to check out the documentation on queued jobs and database transactions.
And that’s your cue to get notifying! 🎤🚀
Alrighty then! You’ve dispatched a notification into the Great Queue in the Sky (that’s just the Laravel queue, for those not in the know). But have no fear, this ain’t some Hitchcockian bird, it’ll eventually find its way to its intended recipient, courtesy of a queued worker.
However, if you fancy yourself as a gatekeeper between your notification and its eventual freedom, then buckle up! You can define a shouldSend method on the notification class. This method serves as the bouncer at the club – if it returns false, well, our feathered friend is going to have to find another joint to strut its stuff in.
Here’s an example of what that might look like:
/**
 * Decide whether this notification should be served up (or not)
 */
public function shouldIBeSent(object $notifiable, string $channel): bool
{
    if ($this->invoice->isPaid()) {
        // The crowd goes wild! Let's get this party started!
        return true;
    } else {
        // Sorry buddy, but you don't meet the dress code tonight. Try again another day.
        return false;
    }
}
So there you have it! You can now stand sentinel over your notifications and control who gets the pleasure of receiving them. Just remember, with great power comes great responsibility – use it wisely!
Alrighty, let’s get this party started! After you’ve fired off a notification like a digital messenger pigeon, you might find yourself with an irresistible urge to crack open a beer and celebrate. But wait, there’s more! You can script some post-delivery shenanigans by defining an afterSending method on your notification class.
This method is like the ‘encore’ of notifications; it gets called when the main event (sending a notification) has ended, and it accepts three special guests:
- The notifiable entity: This is the lucky recipient who got to hear from you firsthand. Hopefully they didn’t throw their phone at you!
- The channel name: A nod to the medium of communication you chose (email, SMS, or Slack—it’s always a party over here).
- The response from the channel: This is what the channel had to say about your message after it delivered it. It might give you a thumbs-up or offer some juicy insights on delivery status.
Here’s an example of how the afterSending method looks in action:
/**
 * Party time! After we sent that notification, let's do the cha-cha.
 */
public function afterSending(object $notifiable, string $channel, mixed $response): void
{
    // Now that we've made sure our message got through, let's pop some champagne and toast to success!
}
So go ahead, unleash your inner maestro, and orchestrate a symphony of post-delivery delights with the afterSending method. Just remember: no confetti cannons in the data center!
Bell Ringer 2.0: On-Call Notifications (With a Twist!)
Let’s say you’re playing the role of a modern-day Pony Express rider, but instead of horseback, you’ve got Laravel by your side! When you need to dispatch a message to someone who isn’t registered as an app user, fear not! The Notification facade’s route method is here to save the day.
Before sending that important missive, spice up the routing details:
use Illuminate\Broadcasting\Channel;
use Illuminate\Support\Facades\Notification;

With a wink and a nudge, Notification decides to take a detour...
Notification::route('mail', '[email protected]')
    ->route('vonage', '5555555555')
    ->route('slack', '#slack-channel')
    ->route('broadcast', [new Channel('channel-name')])
    ->deliversMessage(new InvoicePaid($invoice));
Now, let’s imagine you want to personalize that ‘mail’ message with the recipient’s name. Don’t worry, we got this covered! Just provide an array that includes both their email and a secret nickname:
Notification::route('mail', [
    '[email protected]' => 'Mr. Secret Agent Barrett Blair' // Shhhh, it's a secret!
])->deliversMessage(new InvoicePaid($invoice));
But what if you need to route notifications for multiple channels at once? No sweat! The routes method is the perfect solution:
Notification::routes([
    'mail' => ['[email protected]' => 'Mr. Secret Agent Barrett Blair'],
    'vonage' => '5555555555', // Better keep an eye on your ringtone... it might be our secret agent ringing!
])->deliversMessage(new InvoicePaid($invoice));
And there you have it! With Laravel, being the modern-day Pony Express rider has never been so stylish!
Alright, buckle up buttercup! You’re about to embark on an exhilarating journey through the realm of Laravel email notifications, where magic happens and inboxes get jiggly. 🚀💌
Formatting Mail Messages
Here’s your first stop: Formatting Mail Messages! This is where you can customize the content, subject line, and even add a dash of personalization to each email. Don’t forget to use your best font choices (Comic Sans is optional) and color schemes (neon pink, because why not?).
Customizing the Content
With Laravel, you have full creative control over the email content. You can write a heartfelt apology or craft an enchanting invitation. Just remember to keep it concise and engaging, so your recipients don’t mistake you for a spam bot (you’re better than that!).
Setting the Subject Line
The subject line is your first impression. Make it catchy, enticing, or even slightly mysterious. But remember, keep it under 60 characters to ensure maximum open rates. Trust us; you don’t want to be the email that gets lost in the abyss of unread messages.
Adding a Touch of Personalization
In today’s world, personalization is key! With Laravel, it’s easy to add a recipient’s name or any other relevant data to make your email feel more like a personal letter and less like spam. Just don’t forget to flatter them a bit – it never hurts to win some brownie points!
Sending Email Notifications
Now that your email is looking fabulous, let’s talk about how to send it. With Laravel, sending emails is as easy as pie (or maybe pizza, depending on your preference). Just use the mail() function or queue the email using the queueable trait, and voila! Your message will be on its way to its intended recipient in no time.
Queuing Email Notifications
Queueing emails is like saving your work as a draft before hitting send. It ensures that even if you have tons of emails to send or your server gets busy, they’ll still make it to their destinations without fail. Plus, it’s a great way to take a break and enjoy some well-deserved coffee while the system does the heavy lifting for you!
Customizing Email Notifications
Now that you know the basics, it’s time to make your email notifications truly yours. Customize everything from the sender name and email address to the layout and design of your emails. Let your creativity shine as you create unique and memorable email experiences for your users! 🌈🎉
So there you have it – a quick tour of Laravel’s mail notifications system, packed with tips, tricks, and a touch of humor. Happy emailing, and may your inboxes be forever jiggly! 🤖💌🚀
Crafting Email Masterpieces! 🎨
If a notification prefers to take the email route, it’s time for the notification class to strut its stuff with a swanky toMail method! This fabulous function will be served up a scrumptious $notifiable entity and must dish out an elegant Illuminate\Notifications\Messages\MailMessage instance.
The MailMessage class is like the secret recipe to building delightful, transactional email messages, complete with a dash of action! Let’s stir up a delicious toMail method:
/**
 * Slide into your inbox like an old friend 🕺
 */
public function toMail(object $notifiable): MailMessage
{
    $url = url('/invoice/'.$this->invoice->id);

    return (new MailMessage)
        ->salute('Hey there!', 'Hiya!') // Because who doesn't love a good double greeting? 😎
        ->subjectLine('Invoice Paid Off!', 'Money, Money, Money 💰') // Multiple subject lines for variety!
        ->line('Your invoice has finally kicked the bucket and found peace!')
        ->conditionalLineIf($this->amount > 0, "Amount paid: {$this->amount}", "You paid more than we asked? Now that's generosity! 🤑")
        ->callToAction('View Invoice', $url)
        ->line('Thanks for choosing our app! We hope you enjoy your newfound freedom from debt.')
        ->outroLine('P.S. Remember, we're always here to help if you need us. 💌');
}
[!ATTENTION] In our
toMailmethod, we’ve used$this->invoice->id. To make sure your notification has everything it needs for its performance, pass any data into the notification’s constructor like a well-prepared meal.
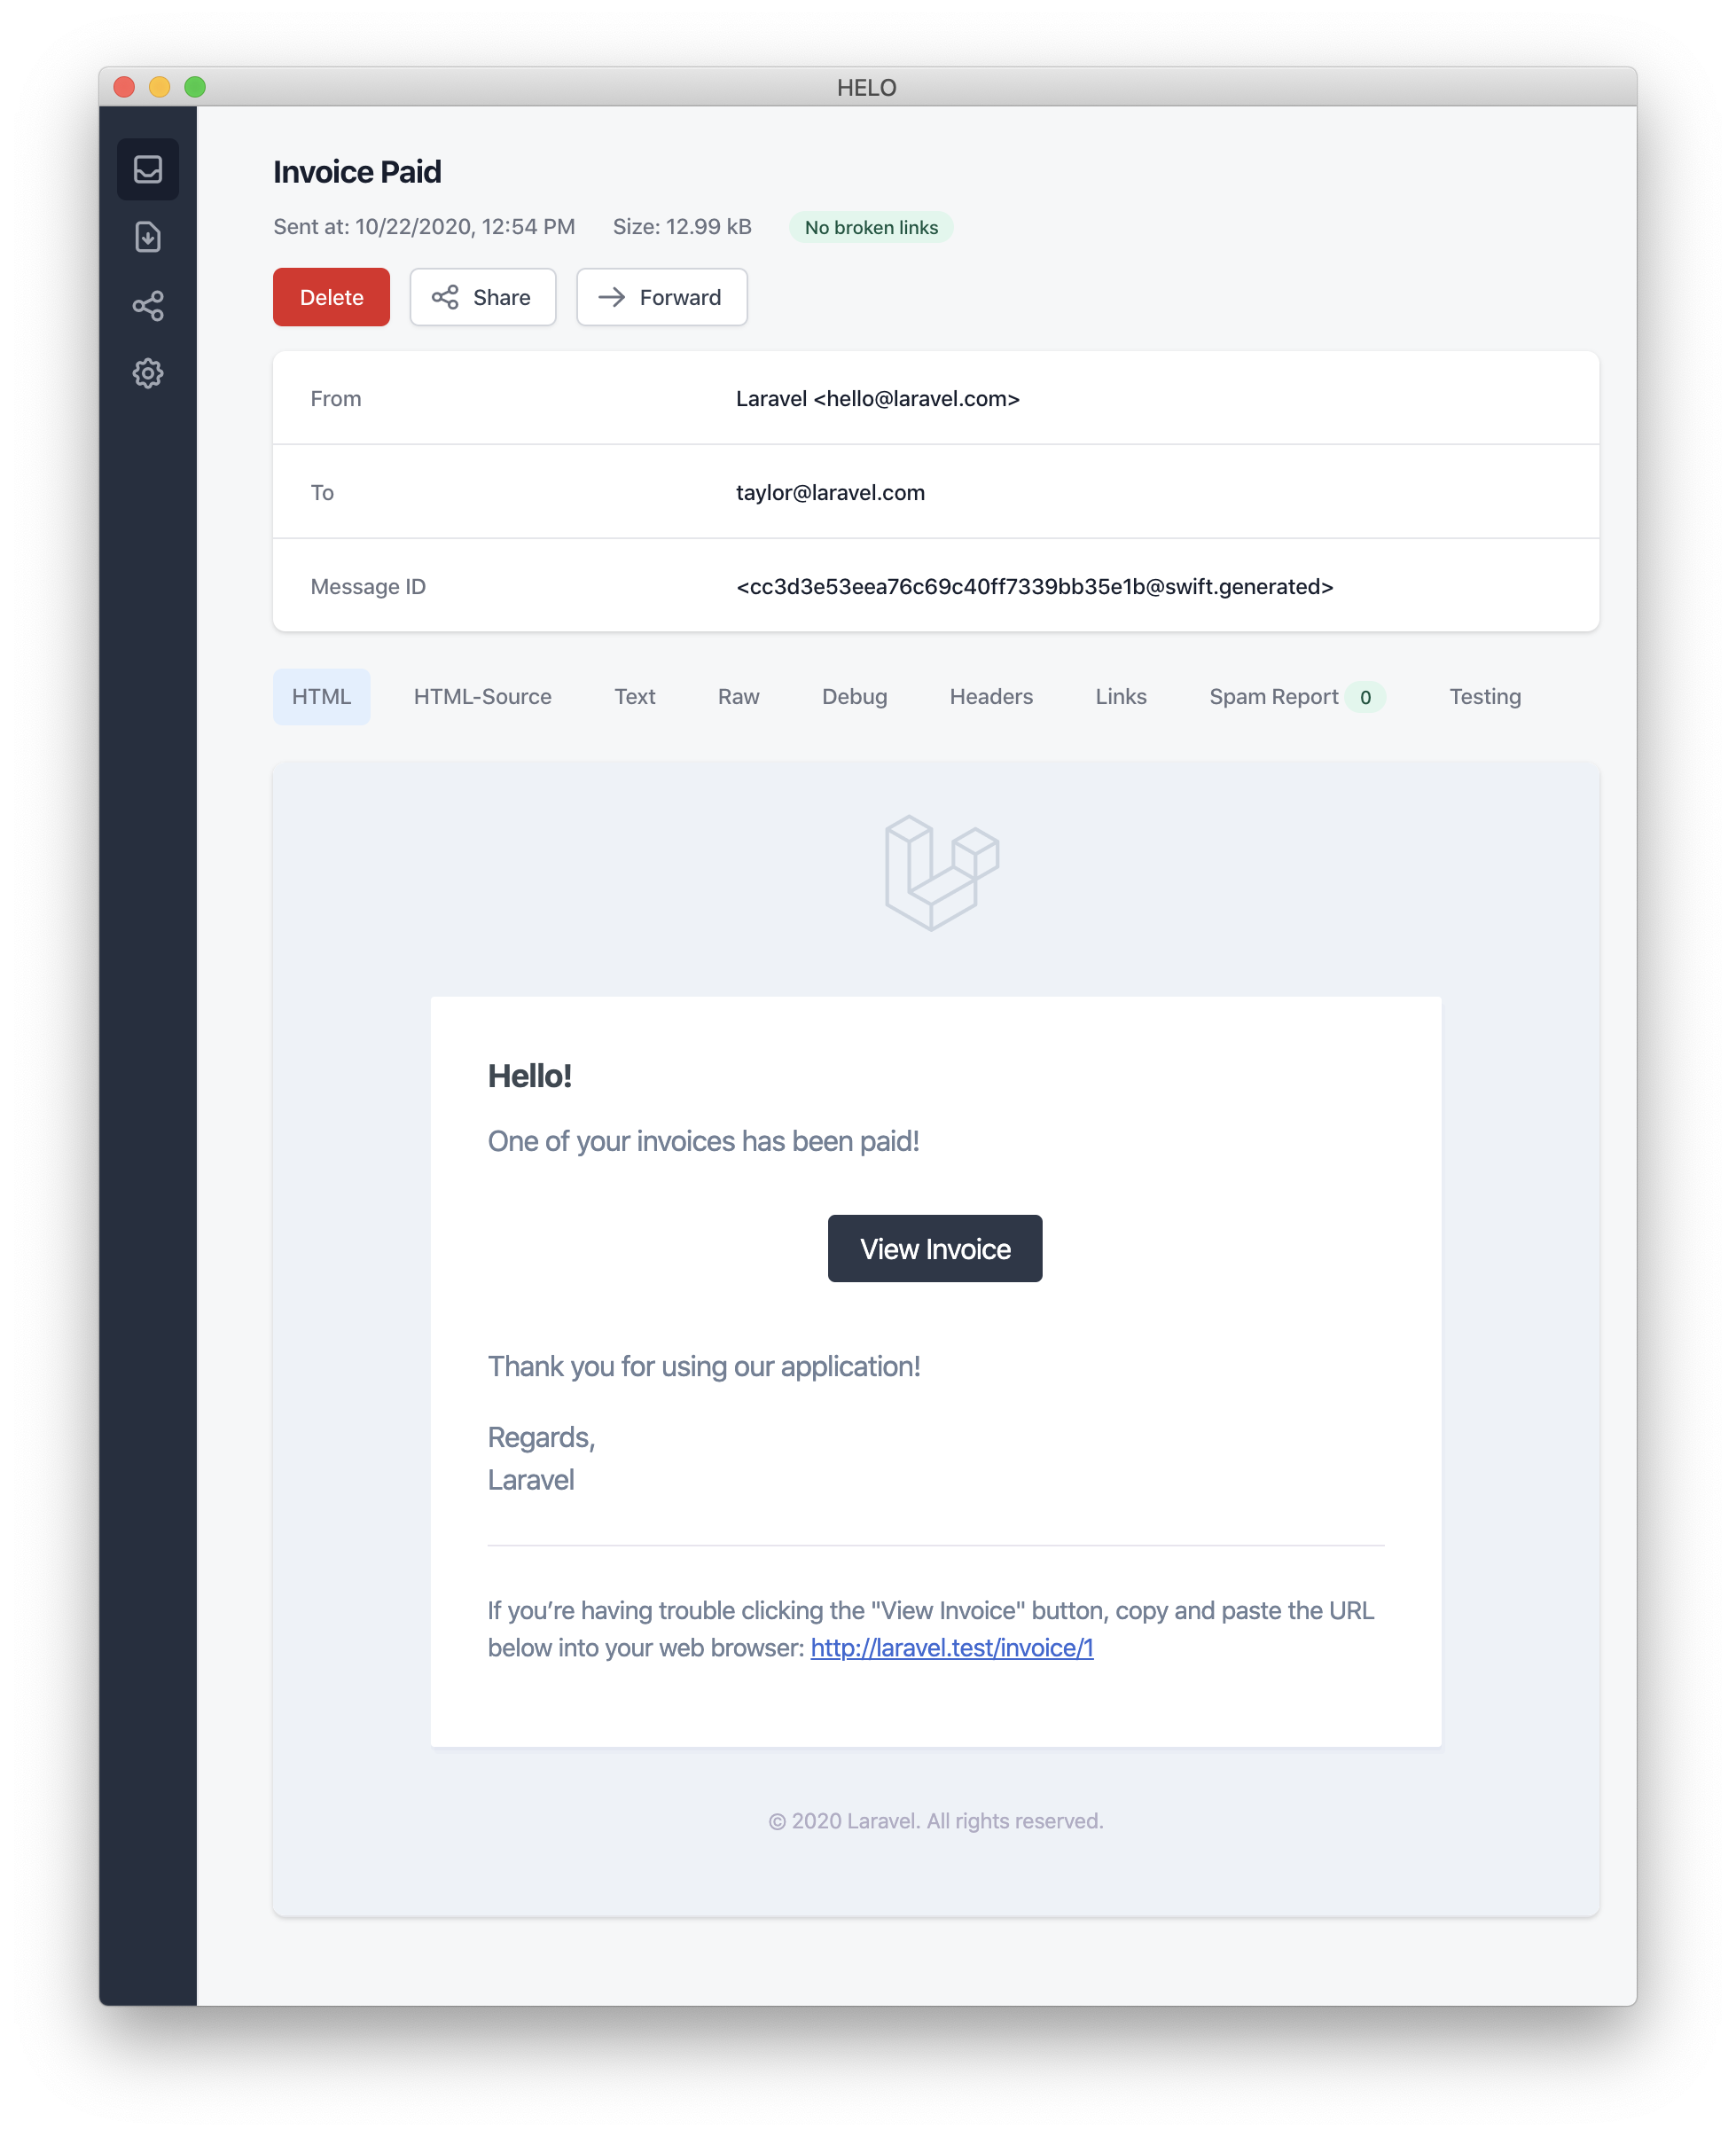
In this example, we serve up a greeting, a line of text, a call to action, another line of text, and a parting message. These delightful methods provided by the MailMessage object make it simple, swift, and oh-so-satisfying to create small transactional emails. The mail channel will then sprinkle some magic on the message components, transforming them into a stunning, responsive HTML email template with a plain-text counterpart. Here’s an example of an email cooked up by the mail channel:
[!ATTENTION] When sending mail notifications, don’t forget to set the
nameconfiguration option in yourconfig/app.phpconfiguration file. This valuable nugget will be featured in the header and footer of your mail notification messages.
Alright, buckle up, error enthusiasts! Here’s a chuckle-filled crash course on Laravel’s Error Messages. You know those moments when your invoice payment goes from smooth sailing to an iceberg encounter? Well, we’ve got the perfect way to break that news to your users - with style!
By summoning the mighty error method (it’s like a superpower for your message), you can transform your notification into a cry-for-help missive. This magical spell will turn your call-to-action button from its usual black suit into a striking red, ensuring your message stands out like a sore thumb in the sea of emails.
/**
 * Channel the ghost of failed invoice payments and make it scream!
 */
public function toMail(object $notifiable): MailMessage
{
    return (new MailMessage)
        ->error() // Time to don the sackcloth and ashes!
        ->subject('Invoice Payment: Titanic Moment')
        ->line('...'); // The unsinkable tale unfolds...
}
And there you have it, folks! Turn your error notifications into a drama-filled blockbuster that would make even the most stoic user shed a tear. Happy coding (and error handling)! 🎉💔
Alrighty, let’s dive into the world of mail notifications! If you’re tired of defining your notification like a Shakespearean sonnet, fear not! Laravel offers a delightful alternative. 🚀
Instead of penning each line in the notification class, you can use the view method to point towards a custom template for your email masterpiece. Just think of it as choosing a different paintbrush or typeface to add that extra flair! 🎨
/**
 * Transform into a fancy mail envelope.
 */
public function toMail(object $notifiable): MailMessage
{
    return (new MailMessage)->view(
        'mail.invoice.paid', ['invoice' => $this->invoice] // Whip up that invoice email!
    );
}
Now, if you want to send a plain-text version of your masterpiece, simply pass the view name as the second ingredient in an array:
/**
 * Turn this text into a fancy mail envelope.
 */
public function toMail(object $notifiable): MailMessage
{
    return (new MailMessage)->view(
        ['mail.invoice.paid', 'mail.invoice.plain-text'], // In case you're feeling extra plain
        ['invoice' => $this->invoice] // Don't forget the invoice!
    );
}
But wait, there’s more! If your message is as simple as a haiku, you can use the text method:
/**
 * Text-ify this into a fancy mail envelope.
 */
public function toMail(object $notifiable): MailMessage
{
    return (new MailMessage)->text(
        'mail.invoice.plain-text', ['invoice' => $this->invoice] // Keep it short and sweet!
    );
}
And let’s not forget about customizing the sender… You can change their name and address with the from method:
/**
 * Set up the mail envelope's return address.
 */
public function build()
{
    $this->from('[email protected]', 'Friendly Sender Name'); // Now your emails will be signed by a friendly name! 🤖
}
Happy notifying, and may your inboxes overflow with well-crafted mail art! 🎉🎨📧
Let’s Get this Email Party Started! 🎉📧
By the way, who decided that the email’s sender should be a mysterious figure lurking in some ancient configuration file? Oh well, we’re not here to judge, just to help you send emails like a pro!
Now, if you fancy dressing up your notifications and making them less bland, you can do that too. Simply specify the from address for a specific notification using the from method - it’s as easy as pie (and way more delicious).
/**
 * Serve up the email like a fine dining experience!
 */
public function toMail(object $notifiable): MailMessage
{
    return (new MailMessage)
        ->from('[email protected]', 'Disco Don - Your Favorite Spin-Master') // Because every email should have a catchy stage name
        ->line('...');
}
Remember, in the world of emails, it’s all about making a good first impression! 😉💌
Unleashing the Secret Identity of Your Notifications!
In the daring world of sending emails through the mail channel, the notification system plays the role of a cunning sidekick. It’s always on the lookout for an email property hiding among your notifiable superheroes. But, what if Superman doesn’t want to use his Kryptonian email? Well, you can customize the delivery address by summoning the magic of the routeNotificationForMail method!
<?php

namespace App\Models;

use Illuminate\Foundation\Auth\User as Authenticatable;
use Illuminate\Notifications\Notifiable;
use Illuminate\Notifications\Notification;

class User extends Authenticatable
{
    use Notifiable;

    /**
     * Route notifications for the mail channel.
     *
     * @return  array<string, string>|string
     */
    public function routeNotificationForMail(Notification $notification): array|string
    {
        // Unmask the secret email address...
        return $this->email_address;

        // Or if you prefer a joint signature, reveal the name too...
        return [$this->email_address => $this->name];
    }
}
And don’t forget to spice things up by personalizing the subject line! Customize it using the toMail method in your notification class. It’s like adding a dash of secret sauce to your email, making it stand out among the sea of inbox monotony.
<?php

namespace App\Notifications;

use Illuminate\Bus\Queueable;
use Illuminate\Contracts\Queue\ShouldQueue;
use Illuminate\Notifications\Messages\MailMessage;
use Illuminate\Notifications\Notification;

class Reminder extends Notification implements ShouldQueue
{
    use Queueable;

    /**
     * Create a new notification instance.
     *
     * @return void
     */
    public function __construct()
    {
        // ...
    }

    /**
     * Get the mail representation of the notification.
     *
     * @param  mixed  $notifiable
     * @return \Illuminate\Notifications\Messages\MailMessage
     */
    public function toMail($notifiable): MailMessage
    {
        return (new MailMessage)
                    ->subject('Reminder from the Future') // Don't forget to add a catchy subject line!
                    ->line('The time has come, citizen. Do not be late!')
                    ->action('View Reminder', url('/reminders/' . $this->id))
                    ->line('Thank you for using our service!');
    }

    /**
     * Get the array representation of the notification.
     *
     * @param  mixed  $notifiable
     * @return array
     */
    public function toArray($notifiable)
    {
        return [
            // ...
        ];
    }
}
Now, let’s get those emails flying like superhero capes, and remember: A well-timed, personalized email is worth a thousand text messages!
Channeling Your Inner Bard, Email’s Subject is Yours for the Taking! 🎃
Ahoy there, brave developer! By now, you’ve undoubtedly noticed that our emails come with a subject line as poetic as the sonnets of Shakespeare (kinda… sorta). By default, it’s the class name of your notification, all dressed up in fancy Title Case. So if yourNotification is called InvoicePaid, prepare to be addressed like a royal with Invoice Paid as your new regal title!
But fear not, for we know that one-size-fits-all isn’t everyone’s cup of tea (or mug of mead, if you will). If you fancy a more customized subject line, you’ve come to the right place. It’s as easy as calling out to minstrels in medieval times: simply use the subject method when constructing your message!
/**
 * Gather ye here for the tale of the notification's email!
 */
public function toMail(object $notifiable): MailMessage
{
    return (new MailMessage)
        ->subject('A Tale of Notification') // Customize me, friend!
        ->line('...');
}
Remember, with this newfound power, you can now pen your own epic saga for every email, ensuring that recipients will be as enthralled as an audience at the Globe Theatre. Happy customizing! 🎉🥳
Unleash your Inner Email Ninja!
By default, our system is like a samurai, silently sending emails with the grace of a well-oiled sword (thanks to the default mailer in config/mail.php). But why settle for one warrior when you can be a whole ninja squad? You got it! Customize that mailer at will by using the mystical mailer() incantation while crafting your message:
/**
 * Transform this notification into an email, in an enchanting manner.
 */
public function toEmail(Ninja $notifiable): EmailMessage
{
    return (new EmailMessage)
        ->mailer('mythical_raven') // You can summon any mailer you desire!
        ->line('...'); // Don't forget to add your secret scrolls of wisdom.
}
Just remember, every ninja has their own unique skills. So, customize the mailer and make it yours!
Ahoy there! Fancy customizing your Laravel mail notifications, eh? Well, buckle up, sailor! You’re about to embark on a whirlwind adventure of HTML and plain-text template modification! 🎉🌈
First things first, you’ll need to publish the notification package’s resources. Fear not, this is easier than catching fish with a butterfly net! Just run this command:
php artisan vendor:publish --tag=laravel-notificationsOnce you do, your mail notification templates will magically appear in the resources/views/vendor/notifications directory. It’s like a surprise box of chocolates—but instead of sugar and calories, you get beautiful code! 🍬🚀
And there you have it, matey! You’ve now got the keys to the kingdom (or at least, the templates). Go forth and customize those notifications with wild abandon! Just remember, with great power comes great responsibility. Don’t turn your emails into a pirate’s treasure map—unless that’s part of your branding strategy, of course! 🏴☠️📜
Alright, buckle up! Let’s embark on an adventure through the enchanting world of Laravel attachments. Because who said emailing files had to be as exciting as watching grass grow? 🥱
First off, if you wanna add some swag to your emails (who doesn’t?), use the attach method like a boss while crafting your message. This magical method takes the absolute path to the file as its first argument, so it can be something like /path/to/your-awesome-file.pdf.
public function toMail(object $notifiable): MailMessage
{
    return (new MailMessage)
        ->greeting('Hey there!')
        ->attach('/path/to/file'); // Now your recipient's inbox is about to get lit! 🔥
}
Now, for the secret sauce – you can customize your file display name and MIME type by passing an array as the second argument:
public function toMail(object $notifiable): MailMessage
{
    return (new MailMessage)
        ->greeting('Hey there!')
        ->attach('/path/to/file', [
            'as' => 'name.pdf', // This will be the name that appears in the recipient's inbox
            'mime' => 'application/pdf', // Helps email clients understand what kind of file it is
        ]);
}
Attaching files in mailable objects is a bit different, and you can’t attach a file directly from storage using attachFromStorage. Instead, use the attach method with an absolute path to the file on the storage disk or return a mailable.
use App\Mail\InvoicePaid as InvoicePaidMailable;

public function toMail(object $notifiable): Mailable
{
    return (new InvoicePaidMailable($this->invoice))
        ->to($notifiable->email)
        // Now you're serving up those files like a pro! 🍔
        ->attachFromStorage('/path/to/file');
}
And if you need to attach multiple files, the attachMany method is your new best friend:
public function toMail(object $notifiable): MailMessage
{
    return (new MailMessage)
        ->greeting('Hey there!')
        ->attachMany([
            '/path/to/forge.svg', // Because developers need their forges close by 🛠️
            '/path/to/vapor.svg' => [
                'as' => 'Logo.svg',
                'mime' => 'image/svg+xml', // That's some next-level customization, my friend! 🚀
            ],
        ]);
}
And there you have it, folks! Now you’re all set to rock those emails with some serious file game. Happy coding, and may your inboxes be ever filled with delightful attachments! 🎉🎁🚀
Ahoy there, coding cowboy! Ever found yourself in a pickle trying to serve up some bytes like a juicy steak at a Wild West saloon? Well, buckle up because Laravel’s attachData method is about to be your new best friend!
This trusty sidekick lets you sling raw data as an attachment with the ease of twirling a six-shooter. Just remember to give your new pal a catchy name, like ‘name.pdf’, before you hitch it up:
/**
 * Serve up that mail just like a good ol' cowboy cookin' his dinner!
 */
public function toMail(Notifiable $notifiable): MailMessage
{
    return (new MailMessage)
        ->greet('Howdy partner!') // Hey, you never know, it could be an outlaw opening your mail!
        ->tossOutData($this->pdf, 'name.pdf', [  // Tossing data like a cowboy tossin' his lasso!
            'mime' => 'application/pdf',
        ]);
}
Now that’s what I call serving up some technical savvy with a side of chuckles! Keep on codin’ and keep the laughter rollin’!
Unleashing the Power of Email Magic! 🪄💫
You know those magical third-party email providers like Mailgun and Postmark? They’re not just regular Hogwarts owls; they come with their own set of wands - tags and metadata! 🎩✨ These enchanting spells can help you organize and track emails dispatched by your app like a pro.
Here’s how to cast the spells in PHP:
/**
 * Turn notifications into enchanted letters.
 */
public function toMagicLetter(object $notifiable): MailMessage
{
    // Don't forget to greet! 👋
    return (new MailMessage)
        ->greeting('Comment Upvoted!')
        // Tagging the letter with "upvote" for easy sorting. 🏷️🔍
        ->tag('upvote')
        // Adding metadata to mark the comment_id on this magical scroll. 📜🔑
        ->metadata('comment_id', $this->comment->id);
}
If you’re using our app as your wand (the Mailgun driver), head over to Mailgun’s documentation for more details on tags and this site to learn about metadata. For Postmark users, you can find the secrets of their tagging and metadata support here and here.
If you’re using Amazon SES to send emails, remember to attach their tags (their version of magical charms) with the metadata method. Learn more about it here. ✨🔮
Unleashing Your Inner Mad Scientist: Customizing the Symfony Message!
Ahoy there, Laravel maestros! Buckle up for a whirlwind ride through the world of customizable emails! The withSymphonyMessage method, found in the glorious MailMessage class, is our secret weapon. This bad boy lets you attach a magic spell (or a closure if you prefer potions over spells) that gets summoned with the mighty Symfony Message object before the message sets sail!
Use ye olde `Symfony\Component\Mime\Email`, good sirs and madams!

**Brew thy potion of notifications:**

public function toMail(object $notifiable): MailMessage
{
    return new MailMessage(function (Email $message) {
        // Transform the message with your arcane knowledge
        $message->getHeaders()->addTextHeader(
            'Custom-Header', 'Header Value'
        );
    });
}
And there you have it! Now, you can unleash a flurry of custom headers upon your unsuspecting recipients. Just remember, with great power comes great responsibility (and emails with cool customizations). Happy coding! 🚀💌
Unleashing the Power of Mailables! 📮🚀
If you’re feeling fancy and want to send a full-blown space shuttle (okay, maybe not quite that extreme) of an email instead of a simple postcard, you can return a fabulous Mailable object from your notification’s toMail method. Picture it like this:
Use the right tool for the job! 🔧

* App\Mail\InvoicePaid as InvoicePaidMailable
* Illuminate\Mail\Mailable

/**
 * Turn a dull notification into an email extravaganza!
 */
public function toMail(Notifiable $notifiable): Mailable
{
    // Prepare the InvoicePaid shuttle for launch 🚀
    $invoiceSpacecraft = new InvoicePaidMailable($this->invoice);

    // Set the recipient's email as the destination (because who wants an unread email?) 📧
    $invoiceSpacecraft->to($notifiable->email);

    // Return this fabulous spaceship of an email to be sent off into the interwebs 🌐🚀
    return $invoiceSpacecraft;
}
Hey there, Mr. or Mrs. On-Demand! 📣
By using Mailables, you’re able to create and send emails dynamically based on specific events or user actions (like when an invoice gets paid, for example). Just remember, with great power comes great responsibility - so make sure those emails are as witty and engaging as possible! 😎🎉
Ah, the world of Laravel notifications! A whirlwind of emails, on-demand and otherwise. Let’s dive in, shall we? 💼🌊
On-Demand Notifications: The Cinderella of Emails 👰🏼🦄
When you’re sending an on-demand notification, the recipient is no commoner but an instance of Illuminate\Notifications\AnonymousNotifiable. Think of it as a humble footman, who just happens to know how to send emails. This noble soul offers a routeNotificationFor method, perfect for figuring out where that on-demand email should be delivered 📧🏠
use App\Mail\InvoicePaid as InvoicePaidMailable;
use Illuminate\Notifications\AnonymousNotifiable;
use Illuminate\Mail\Mailable;

/**
 * The fancy ballroom where the mail representation of the notification happens.
 */
public function toMail(object $notifiable): Mailable
{
    $address = $notifiable instanceof AnonymousNotifiable
        ? $notifiable->routeNotificationFor('mail')  // Our humble footman knows his way around here!
        : $notifiable->email;  // But if he's not around, we just ask the guest directly.

    return (new InvoicePaidMailable($this->invoice))
        ->to($address);   // And off goes the email to its destined recipient!
}
Now, let’s say you want to peek at this ballroom before sending out invites. You can preview the notifications using the viaMail() method. It’s like getting a sneak peek at the ballroom layout and making sure everything is just right 🤳🏼💭
use App\Notifications\InvoicePaid;
use Illuminate\Support\Facades\Notification;

// Make sure our humble footman (AnonymousNotifiable instance) is present at the ball
$user = App\Models\User::find(1);
Notification::send($user, new InvoicePaid());

// Peek into the ballroom to see how it looks
$preview = Notification::viaMail($user)->previews();
dd($preview); // Don't forget to double check everything! 👀💃🏼
Hope this whimsical walkthrough was helpful. Keep on notifying and spreading the joy of Laravel! 🎉🤖🎈
Mail Notification Sneak Peek! 📧✨
Fancy designing a snazzy email template without the hassle of actually sending it to Uncle Bob in accounting? 🤔 Well, have we got news for you! Laravel’s got your back with its magical ability to preview mail notifications right in your browser, just like a fancy Blade template.
To pull off this trick, Laravel lets you return any swanky mail message generated by a notification directly from a route closure or controller. When a MailMessage is served up, it’ll be transformed into an email and displayed on the screen for your delightful approval:
Use the Force, young Jedi! 💫 (just kidding... but feel free to channel your inner Obi-Wan)

Use App\Models\Invoice;
Use App\Notifications\InvoicePaid;

Route::get('/notification', function () {
    $invoice = Invoice::find(1);

    return (new InvoicePaid($invoice))
            ->toMail($invoice->user);
});
Now, you can design eye-catching emails and give them a whirl without bothering actual email addresses or even poor Uncle Bob! 🥳🎉
Ahoy there, adventurous developer! Let’s embark on an exciting journey into the world of Markdown Mail Notifications - where emails meet the elegance of Markdown and the power of Laravel! 🌈🚀
Markdown mail notifications are like the secret sauce that lets you savor the pre-prepared templates of email notifications, all while allowing you to compose lengthy, bespoke messages tailored to your needs. The best part? Since these messages are penned in the universal language of Markdown, Laravel effortlessly transforms them into stunning, mobile-friendly HTML emails and a handy plain-text companion! 🤖✨
Now, let’s dive into how to craft your masterpiece (er, email) using Markdown. Follow these simple steps, and soon you’ll be sending out emails that will have everyone hitting the ‘Reply’ button with enthusiasm! 🤗💌
- Compose your message: Write your message using Markdown syntax. Remember, it’s akin to speaking the language of the internet, so things like
# Heading,**Bold**, and_Italic_will help you style your email like a pro! 🧑💻🕵️ - Insert placeholders: Laravel is smart enough to recognize special placeholders, such as
{name}or{order_number}. These tags allow you to personalize your emails with dynamically generated content based on the user and context! 🎩📝 - Send off your email: Incorporate your Markdown message into your Laravel notification, along with any other data you want to include. Then, sit back and watch as Laravel takes care of the heavy lifting, converting your Markdown into a beautiful HTML email that’s ready to be sent out! 🎈📧
- Plain-text version: For those who prefer plain text emails or for when things go wrong (we’ve all been there), Laravel automatically generates a plain-text version of your email. So even if the HTML version looks like a cat walked through your keyboard, at least your message gets across! 🐱👓📝
And that’s a wrap! Now you’re well on your way to becoming a Markdown Mail Notification maestro, crafting emails with style and substance. Happy coding, and may your inboxes be full of joyful replies! 🎉🤗💌
Alrighty, let’s crack open the Laravel notification factory and whip up a Markdown masterpiece! 🎨📝
First things first: you gotta generate your notification with a fancy Markdown template. To do that, fire up your terminal and drop this bad boy in there:
php artisan make:notification InvoicePaid --markdown=mail.invoices.paid_like_a_bossDon’t forget to give it a cool name (we went for “paid_like_a_boss”). Now your notification class is ready, but we need to make it dance the Markdown tango! 💃️🕺️
Like any other suave mail notifications, your Markdown-powered notifications should have a smooth toMail method. Instead of using the usual line and action moves, we’re gonna let the markdown dance step take over:
/**
 * Fetch the email representation of this notification.
 */
public function toMail(Notifiable $notifiable): MailMessage
{
    $invoice_url = url('/invoices/' . $this->invoice->id);

    return (new MailMessage)
        ->subject('Invoice Paid')
        ->markdown('mail.invoices.paid_like_a_boss', ['invoice_url' => $invoice_url]);
}
Now you’re all set to dazzle your users with a stylish, Markdown-powered notification! Just remember: when in doubt, add more emojis 🤖🎉🚀💖
Ahoy there, pirate! 🚀🏴☠️ Buckle up for a swashbuckling adventure through the seas of email notifications! 🌊✨
Prepare to embark on an epic journey where you’ll harness the combined powers of Blade components and Markdown magic! 🎩🔮 You see, ye be needin’ naught but a wee bit o’ code to craft notifications that’d make Captain Blackbeard himself proud.
<x-mail::message>This is yer first matey! It’s the gateway to Laravel’s pre-built notification components. So hop aboard and let’s sail through the shark-infested waters of Markdown syntax. 🦈🐟 Remember, ye can mix ‘n match Blade components and Markdown as ye see fit!
So hoist yer sails high, set a course for adventure, and happy coding! 🌴🍹 May your emails be filled with treasure maps, grog, and unparalleled swashbuckling style. 🏴☠️🎉
🎉 Hooray! Your invoice has been paid like a rockstar at a concert! 🤘
<x-mail::sparkly-button :url=“$url”> Check out your Paid Invoice 💳 </x-mail::sparkly-button>
A round of applause for you,
The Laravel Orchestra, where code and humor harmonize! 🎶
PS: Remember, too much indentation turns emails into secret coded messages. Our Markdown parsers aren’t CIA-level spies! 🕵️♀️✋🏿👩🏽🦳🤓🐱👓
[button-component]: Yes, it’s a magical button. Just click and watch the show unfold!
Ahoy there, code cowboys and coding cowgirls! Let’s dive into the whimsical world of Laravel’s Button Component – your new digital magic wand!
This cheerful chap is here to bestow upon you a centrally aligned button link that’ll make your notifications more clickable than a cat video at lunchtime. The component is as friendly and easy-going as a prairie dog, only instead of burrowing into the ground, it renders your buttons with style!
This little fella accepts two arguments – a url and an optional color. Now hold onto your ten-gallon hats because we’ve got some colorful news for you. Our palette consists of the classics: primary, the ever-dependable Sheriff, and the wild and free duo of green and red, the outlaws of the frontier. So saddle up and let your creativity run wild!
<x-mail::button :url="$url" color="green">
Gallop on over to that Invoice!
</x-mail::button>
And don’t be shy, cowpokes – feel free to add as many button components to a notification as you please. After all, why settle for just one when you can have an entire posse of clickable buttons? Happy codin’, y’all!
Ahoy there, matey! Sail the seas of email templates with the trusty ol’ Panel Component, a beacon for your text in a sea of notifications! This swashbuckling companion sets its sails with a slightly swabbed-deck background color, making it a perfect pirate to help you stand out from the rest of the crew.
Yarr, just drop anchor and fire up your blade:
<x-mail::shiver_me_timbers>
Ahoy! This here is our panel content.
</x-mail::shiver_me_timbers>
Don’t be a landlubber! Unleash your inner sea dog and captivate the hearts of recipients with this nautical marvel! 🏴☠️🎉
Ahoy there, matey! Let’s embark on a thrilling journey of transforming your Markdown tables into swashbuckling HTML tables with the help of our pirate-approved Table Component! This magic carpet ride accepts nothing but Markdown tables as its ransom, er… content.
Now, ye might be wonderin’ how to align yer columns like a seasoned sea dog. Fear not, for we gotcha covered with good ol’ Markdown table alignment syntax. Here’s an example that’ll have ye walkin’ the plank with pride:
<x-mail::table>
| Captain Cook      | Ship         | Treasure       |
| ----------------- | :-          | -------------- |
| Col 2 is Centered | (Centered)   | $10            |
| Col 3 is Right    | (Right-Aligned) | $20           |
</x-mail::table>
Now, if ye fancy customizin’ these components, feel free to hoist yer sails and navigate to the section titled “Customizing the Components”! May your seas be smooth, and may yer treasure be plentiful! 🏴☠️🌴💰
Unleash Your Inner Designer with Laravel’s Markdown Notification Makeover! 🎨🚀
Ready to put your creative stamp on those notifications? With Laravel, you can export all the cool Markdown components for a personalized touch! To do this magic trick, just invoke the mystical Artisan spell:
php artisan cast-a-spell vendor:publish --tag=laravel-mailBehold as this command sprinkles the enchanting laravel-mail asset tag into your application’s lair, specifically in the resources/views/vendor/mail directory. This mystical forest will grow two groves: an html and a text sanctuary, each home to the mystic representations of every available component. Feel free to wave your own brush over these enchanted groves!
Now, if you’re feeling extra daring (and let’s be honest, who isn’t?), you can even cast a CSS spell on those components to really make them sparkle. Just remember that with great power comes great responsibility: don’t break the charm! 🧙♀️✨
Alright, let’s get this party started! You’ve just exported your components and found yourself in a smorgasbord of styles, nestled cozily within resources/views/vendor/mail/html/themes. The pièce de résistance? A little ditty called default.css, ripe for a fashion makeover!
Ready to unleash your inner Gaga and redecorate this joint? Go ahead, give it your best spin! Your custom CSS will seamlessly blend into the HTML renditions of your Markdown notifications, like a well-choreographed dance number at the Oscars.
Fancy building a brand new theme for Laravel’s Markdown components? Simply place a fresh, sparkling CSS file in the html/themes directory and christen it with a name that screams originality (or perhaps just something vaguely related to your project). Save that beauty, and voilà! Update the theme option of the mail configuration file to match your dashing new theme’s moniker.
Now, if you’re feeling extra fancy, you can customize the theme for an individual notification with the grace of a ballerina on pointe. To do so, simply invoke the theme method when constructing the mail message for your notification. This enchanting spell accepts the name of the theme you wish to use when the notification is dispatched:
/**
 * Get the mail representation of the notification.
 */
public function toMail(object $notifiable): MailMessage
{
    return (new MailMessage)
        ->theme('invoice')
        ->subject('Invoice Paid')
        ->markdown('mail.invoice.paid', ['url' => $url]);
}
Now, wasn’t that a walk on the wild side? Happy customizing!
Database Bell-Ringers 🔔🎉
Brace yourself, tech titans! It’s time to dive into the exciting world of database notifications. But first, let’s make sure we have all the necessary equipment - you wouldn’t want to be caught without your boots on in a field of data, would you? 🌱
Database Bell-Ringers: Prep Time 🍲🎤
Before we get started, there are a few things you’ll need to tick off your checklist. You might want to grab a snack, because this is going to be a tasty ride! 🥪
- Install Laravel (if you haven’t already) - we’re not making a sandcastle here, but a castle of data 🏰!
- Set up a database connection in your
.envfile. Don’t worry if you haven’t mastered the art of potion brewing just yet, our Laravel wizardry takes care of that for us. 🧙♂️✨
Now that we’re all set and our stomachs are full, let’s dive into the main course: Database Notifications! 🍽️👩🍳
Database Bell-Ringers: The Main Event 🎪🥓
Welcome to the grand stage where data meets drama! With Laravel’s bell-ringing capabilities, you can keep your eyes on the prize (or rather, your database) without having to check it every five minutes. Talk about a time saver! ⏱️🎉
To create a notification channel, all you have to do is:
- Use the
php artisan make:channelcommand in your terminal to generate a new channel class. Give it a name that suits its purpose, like “database-updates.” - Override the
sendmethod in your newly created channel class, and write the logic for what happens when a notification needs to be sent - whether it’s updating a row, deleting a user, or something even more spectacular! - Register your custom channel by adding it to the array of notifiable channels in the
AppServiceProvider. - To test things out, use Laravel’s trusty tester to simulate events and see if your new bell-ringer is working its magic. 🧙♀️✨
And there you have it! You’ve now created a custom notification channel that will alert you whenever important things happen in your database - like a data-detective, but with way more style (and less trench coat). 🕵️♂️
So go forth and conquer the world of databases! With Laravel’s bell-ringers, you can keep the party going without ever missing a beat. 🎉🥳✨
Alright, let’s get this party started! If you’re here, it means you’ve stumbled upon Laravel’s database notification channel - a secret underground dance floor where notifications go to cut a rug. But instead of disco balls and funky tunes, we’ve got databases and JSON structures!
This dance floor (or table, if you prefer) keeps track of all the notification types and their groovy details. But remember, it’s like the cool kid’s party; you gotta create your own invitation (database table) to get in on the fun. No need to bust out your DJ skills, though – Laravel’s got you covered with a nifty command: php artisan make:notifications-table. Just run this in your terminal, and it’ll whip up a migration invite for you!
After that, it’s time to send out the invitations (migrate): php artisan migrate.
[!NOTE] If your notifiable models are using UUID or ULID keys as their primary identifiers, don’t forget to swap out the
morphsmethod with eitheruuidMorphsorulidMorphsin the notification table migration. It’s like upgrading from a disco ball to a mirror ball - it might not seem important, but trust us, it adds that extra sparkle!
Now that you’ve got your own spot on the dance floor (or database), let’s get those notifications moving and grooving in your application’s user interface! The party never stops here! 🎉💃🕺️
Alright, buckle up, database notification aficionados! Here’s a hilarious take on formatting your Laravel notifications - it’s like composing a symphony, but instead of notes, we’re dealing with data arrays.
When you create a notification that can be stored in your database (because, let’s face it, who doesn’t love a good database party?), you need to define either the toDatabase or the toArray method for your notification class. These methods are like your charming introductions at the dance floor: they receive a $notifiable entity and should return a plain PHP array that is then converted into a JSON-danced and stored in your notifications table’s data column.
Here’s an example toArray method that will make your database shake its tail feather:
/**
 * Serve the notification a fancy appetizer of array form.
 *
 * @return array<string, mixed>
 */
public function toArray(object $notifiable): array
{
    return [
        'invoice_id' => $this->invoice->id,
        'amount' => $this->invoice->amount,
    ];
}
Now, when your notification gets saved in your application’s database, it’s like the prom night: by default, the type column will be set to its class name (the corsage for your notification), and the read_at column will be as virginal as a fresh balloon (null). But hey, who wants default when you can customize? You can dance your own tune by defining the databaseType and initialDatabaseReadAtValue methods in your notification class:
use Illuminate\Support\Carbon;

/**
 * What's the type of this notification on the dance floor?
 */
public function databaseType(object $notifiable): string
{
    return 'invoice-paid';
}

/**
 * What's the initial value for the "read_at" column?
 */
public function initialDatabaseReadAtValue(): ?Carbon
{
    return null;
}
Now, aren’t these techniques a jazzy way to store your notifications in the database? Let’s keep this party going! 💃🕺️⚙️
Ahoy there! Buckle up, code cowboys and codettes, as we dive into the thrilling world of Laravel arrays! First off, let’s talk about the ever-versatile toArray method - a true all-rounder in the world of data representation. But don’t be fooled by its humble name, this little guy is quite the powerhouse, especially when it comes to playing nice with your JavaScript-powered frontend via the broadcast channel.
But what if you’re hankering for two distinct array flavors? Well, buckle up again because that’s where our friend toDatabase comes into play! If you’re longing for separate representations of data for your database and broadcast channels, then this is the method you’ve been waiting for.
Now, let’s imagine a wild west showdown – it’s toArray versus toDatabase. While toArray is the cowboy who rules the dusty streets of JavaScript-land, toDatabase is the sheriff keeping order in the lawless frontier of your database. Both are essential parts of maintaining harmony in your Laravel application.
So, next time you find yourself wrangling data and trying to decide which method to use, remember: toArray for JavaScript and broadcasting, and toDatabase for keeping the peace in your database. Happy coding, partners!
Alrighty, let’s get our nerd on and talk about Laravel’s delightful little feature: Notifications! After you’ve stored these bad boys in the database (think of it like putting them in a digital cookie jar), you’re gonna want an easy peasy way to grab ‘em from your notifiable entities. Enter the Illuminate\Notifications\Notifiable trait, which comes pre-installed on Laravel’s default App\Models\User model (think of it like free kittens). This trait includes a notifications Eloquent relationship that does all the heavy lifting for you, returning the notifications for your entity. To get your hands on these digital doodads, simply access this method like any other Eloquent relationship (think of it like shaking a magical genie lamp). By default, notifications will be sorted by the created_at timestamp with the most recent notifications first, because who doesn’t love a good flashback?
$user = App\Models\User::find(1);

foreach ($user->notifications as $notification) {
    echo $notification->type; // Yes, we are now echoing notification types. Isn't technology grand?
}
If you only want the “unread” notifications (the digital equivalent of a secret envelope), you can use the unreadNotifications relationship. Again, these will be sorted by the created_at timestamp, because timing is everything, even in the digital realm.
$user = App\Models\User::find(1);

foreach ($user->unreadNotifications as $notification) {
    echo $notification->type; // Secret envelopes revealed!
}
If you only want the “read” notifications (the digital equivalent of yesterday’s newspaper), you can use the readNotifications relationship.
$user = App\Models\User::find(1);

foreach ($user->readNotifications as $notification) {
    echo $notification->type; // Yesterday's news, served fresh!
}
[!NOTE] To access your notifications from your JavaScript client, you should define a notification controller for your application which returns the notifications for a notifiable entity, such as the current user. You may then make an HTTP request to that controller’s URL from your JavaScript client.
Now, let’s talk about marking notifications as read (the digital equivalent of tearing a page off the calendar). The Illuminate\Notifications\DatabaseNotification model has a handy-dandy method called markAsRead(). This method can be used to mark all notifications for a given channel as read, or it can be chained with the where() method to mark specific notifications as read.
$user = App\Models\User::find(1);
$notifications = $user->unreadNotifications; // Grab your secret envelopes first!

foreach ($notifications as $notification) {
    $notification->markAsRead(); // Now they're yesterday's news, but at least they're tidy!
}
Or if you want to get fancy with it:
$user = App\Models\User::find(1);
$user->unreadNotifications->where('type', '=', 'App\Notifications\YourNotification')->markAsRead(); // Only mark that specific notification as read!
Alright, buckle up, we’re about to dive into the world of Laravel Notifications! Now, imagine you’ve got a digital doorman who keeps knocking on your user’s digital door with notifications. You don’t want them to feel like they’re living in a haunted house, do you? So let’s teach them how to acknowledge these digital visitors!
The Illuminate\Notifications\Notifiable trait is our digital doorman’s toolkit, complete with a friendly little method called markAsRead. This method grabs the notification’s database record and gives it a fresh coat of “read_at” paint:
Grabbing user 1's handle...

$user = App\Models\User::find(1);

Now, let's go through each unopened notification like a digital doorman checking his guest list:

foreach ($user->unreadNotifications as $notification) {
    $notification->markAsRead();
}
But why walk when you can run? Use the markAsRead method directly on a collection of notifications, just like inviting all your friends to the party at once:
Announcing to the world that user 1 has read his notifications!

$user->unreadNotifications->markAsRead();
Feeling fancy? Mark all notifications as read without even retrieving them from the database, it’s like giving everyone a virtual high-five!
Virtual High-Five to user 1's notifications!

$user = App\Models\User::find(1);

$user->unreadNotifications()->update(['read_at' => now()]);
But wait, there’s more! If you want to sweep away those old notifications like a digital spring cleaner, just delete them:
Sweeping user 1's notifications under the digital rug...

$user->notifications()->delete();
And that, dear reader, is how Laravel Notifications become a little less haunting and a lot more welcoming! Happy coding! 🎉🎈✨
Blast those Notifications! 🚀
Get ready for a sonic boom of communication! 💥 In this thrilling adventure, we’ll unravel the secrets of Broadcast Notifications. No capes or superpowers required - just Laravel and your brilliant mind. 🤓
Prerequisites 🎒
Before diving into the world of broadcast notifications, ensure you’ve got these essentials:
- A Laravel project that shines brighter than a disco ball at Studio 54 (if it’s not, head to laravel.com and get your groove on).
- PHP >= 7.3.0 - because who wants to be stuck in the stone age? Upgrade and join us in the future! 🚀
- A freshly brewed cup of coffee (or tea, or your favorite elixir) - we’ll need energy to navigate this exciting journey!
Now that we’ve got our prerequisites in check, it’s time to blast off and explore the wonders of Broadcast Notifications! 🚀🌟🎈
Alrighty, buckle up, champ! Before we dive into the world of notifying your JavaScript-powered frontend like a digital bat signal, let’s make sure you’re all set with Laravel’s event broadcasting services. Think of it as your backstage pass to the server-side events at the Laravel concert.
Now, imagine you’ve got a golden ticket to Willy Wonka’s Chocolate Factory—but instead of chocolate, we’re talking about real-time updates! To format those broadcast notifications just right, here are the steps:
-
First things first, remember to configure and get cozy with Laravel’s event broadcasting services. It’s like learning how to ride a bike—once you get it, it’s smooth sailing from there!
-
Next up, listen for those sweet, sweet server-side events. Once you’ve got ‘em tuned in, you can react to them faster than Usain Bolt on a double espresso!
-
Don’t forget to publish your event broadcast service provider and configure the EventBroadcastServiceProvider.php file to include your custom broadcasts. This is like setting up your own exclusive VIP section at the Laravel event—exclusively for you, my friend!
-
Finally, don’t be shy about firing off those notifications. It’s like sending out party invites—but in this case, it’s a party your JavaScript frontend won’t want to miss!
Alrighty then! Let’s dive into the thrilling world of broadcasting notifications with Laravel, shall we? This isn’t just your average telegram, but a supercharged version that lets your JavaScript-powered frontend catch notifications in real time, akin to having your own personal bat signal!
If your notification is broadcast-worthy (you know, like telling the world about that killer deal you just scored), you can define a toBroadcast method on the notification class. This chummy chap will receive a $notifiable entity and should return a BroadcastMessage instance. If you don’t define this method, Laravel will fall back to the good ol’ toArray method to gather the data that needs to be broadcast. The data gets transformed into JSON and blasted off to your JavaScript-powered frontend like a digital firework show!
Now, let’s take a gander at an example toBroadcast method:
Use the force, young Jedi! Wait... wrong universe. Let me rephrase that:

Use Illuminate\Notifications\Messages\BroadcastMessage;

/**
 * May the broadcast be with you!
 */
public function toBroadcast(object $notifiable): BroadcastMessage
{
    Return a lightsaber-wielding BroadcastMessage instance, armed with:
        - 'invoice_id' => $this->invoice->id,
        - 'amount' => $this->invoice->amount,
    Prepare to receive your notifications in real time, you Rebel scum!
}
And just like that, you’ve taken the first step towards broadcasting notifications across the galaxy (or at least your application). Happy coding, and may all your broadcasts be with you!
Alright, let’s get this party started!
The Show Must Go On (Queue)
Who doesn’t love a good show? But when it comes to broadcasting notifications in Laravel, we don’t just wing it. Nope, we queue it up! Every single broadcast notification is lined up like stars on Hollywood Boulevard, ready for their big moment.
If you’re feeling fancy and want to customize the connection or name of this queue, fear not! Just like a director giving instructions to the camera crew, you can use the onConnection and onQueue methods in your BroadcastMessage. Here’s how:
return (new BroadcastMessage($data))
    ->onConnection('sqs')  // Switching from 'red carpet' to 'green room'
    ->onQueue('broadcasts');  // Or maybe even 'VIP lounge' if you're feeling extra!
Now, sit back and relax while your notifications get their big break in style!
Ahoy there, intrepid Laravel adventurer! 🎉
Ever wanted to customize the type of your notifications like a digital alchemist? Well, strap in and hold onto your unicorn horns because we’re about to embark on an enchanting journey through the magic of broadcast notifications! 🦄
By default, each notification you send out comes equipped with a type field, which is a fancy way of saying it carries around its full class name. But if you’ve got the itch to personalize your notifications like a peacock showing off its feathers, fret not! With just a smidgen of code, you can define a broadcastType method on your notification class. 🤓
Here’s a little dance routine that’ll help you customize the type of your notifications:
/**
 * Alas! Let's discover the secret type of this enchanting notification.
 */
public function broadcastType(): string
{
    return 'broadcast.message'; // Or whatever tickles your fancy, Captain!
}
Now, when you send out notifications that are more extraordinary than a unicorn fart in the wind, they’ll have their own unique type, making it easier for your app to recognize them and respond accordingly. 🎉🌈🦄
And just like that, you’ve dazzled your Laravel world with custom notification types! Who knew digital wizardry could be so much fun? Keep exploring and remember: in the realm of Laravel, the only limit is your imagination (and perhaps PHP memory limits, but let’s not dwell on that). 😉
Catching Whispers in Laravel Land
Listen up, dear developer! In the mystical realm of Laravel, notifications aren’t just sent, they’re broadcast like secret messages on a private channel. These channels follow a charmingly quirky naming convention: {notifiable}.{id}. So if you’re sending a notification to a charming, chiseled App\Models\User with the ID of 1, the notification will be whispered into the wind on the channel named App.Models.User.1 - Secret Line.
Now, when you want to eavesdrop on these secret conversations (I mean, listen for notifications), you can do so by using the enchanting and magical Laravel Echo. To tune in to a channel, simply cast a spell with the notification method:
Echo.whisperOnPrivate('App.Models.User.' + user_id)
    .listen((whisper) => {
        console.log(whisper.type); // Or, if you prefer, log the whisper's flavor!
    });
Now that we’ve covered the basics of channel listening and eavesdropping, let’s delve into using React or Vue… but that’s a whole different tale for another time! Stay tuned for more secrets from Laravel Land. 😉
Alright, folks! Let’s dive into the world of Laravel Echo, where we make listening to notifications as effortless as napping during a Zoom meeting (and almost as entertaining).
First off, you’ll want to summon the mighty useEchoNotification hook – our superhero for keeping an ear out for those important notifications. Just drop it into your React or Vue component, and it’ll magically hang around until the component bids adieu:
import { useEchoNotification } from "@laravel/echo-react";

useEchoNotification(
    `App.Models.User.${userId}`,
    (notification) => {
        console.log(`Just received a ${notification.type} notification!`);
    },
);<script setup lang="ts">
import { useEchoNotification } from "@laravel/echo-vue";
useEchoNotification(
`App.Models.User.${userId}`,
(notification) => {
console.log(`I've got a hot ${notification.type} notification here!`);
},
);
</script>By default, our hero listens to all notifications, but if you fancy being selective, feel free to specify the types of notifications you’d like to listen to:
import { useEchoNotification } from "@laravel/echo-react";

useEchoNotification(
    `App.Models.User.${userId}`,
    (notification) => {
        console.log(`Received a ${notification.type} notification!`);
    },
    'App.Notifications.InvoicePaid',
);<script setup lang="ts">
import { useEchoNotification } from "@laravel/echo-vue";
useEchoNotification(
`App.Models.User.${userId}`,
(notification) => {
console.log(`Got myself an InvoicePaid notification!`);
},
'App.Notifications.InvoicePaid',
);
</script>And for those of you who like a bit more structure in your life, we’ve got you covered with customizable payload data shapes:
type InvoicePaidNotification = {
    invoice_id: number;
    created_at: string;
};

useEchoNotification<InvoicePaidNotification>(
    `App.Models.User.${userId}`,
    (notification) => {
        console.log(`Got an invoice with ID ${notification.invoice_id} at ${notification.created_at}`);
        console.log(`Received a ${notification.type} notification!`);
    },
    'App.Notifications.InvoicePaid',
);
Tailoring Your Notification Station
Fancy spicing up the broadcasting venue for your entity’s notification parties? No problemo, my friend! You can define a receivesBroadcastNotificationsOn method on the notifiable entity:
<?php

namespace App\Models;

use Illuminate\Broadcasting\PrivateChannel;
use Illuminate\Foundation\Auth\User as Authenticatable;
use Illuminate\Notifications\Notifiable;

class User extends Authenticatable
{
    use Notifiable;

    /**
     * The broadcasting districts the user parties in.
     */
    public function receivesBroadcastNotificationsOn(): string
    {
        return 'users.'.$this->id; // That's right, it's like a personalized VIP room!
    }
}
Now, let’s say you fancy sending out SMS notifications instead of the usual digital pings. You can create your own broadcast channel by defining a custom channel and using it in the receivesBroadcastNotificationsOn method:
<?php

namespace App\Broadcasting;

use Illuminate\Support\Facades\Broadcast;

class SmsChannel
{
    public function name(): string
    {
        return 'sms'; // It's like sending a secret message from Mission: Impossible!
    }
}
Now, update the User model to use this custom channel for SMS notifications:
<?php

namespace App\Models;

use Illuminate\Broadcasting\PrivateChannel;
use Illuminate\Foundation\Auth\User as Authenticatable;
use Illuminate\Notifications\Notifiable;
use App\Broadcasting\SmsChannel; // Import the SMS channel

class User extends Authenticatable
{
    use Notifiable;

    /**
     * The channels the user receives notification broadcasts on.
     */
    public function receivesBroadcastNotificationsOn(): string
    {
        return new SmsChannel(); // That's right, now we're texting like teenagers!
    }
}
Happy customizing and enjoy the personalized notification parties! 🎉🎊
Text Blasts from Laravel HQ 🚀📲
Preparing for Text Messaging Takeoff (Prerequisites) 🛫
To get started with sending text messages, you’ll need a few essentials:
-
SMS Notification Channels: These are the lifelines that connect your app to the vast world of mobile networks. You can find them in the
config/notificationdirectory. -
Twilio SMS Account: It’s like a secret agent identity for your Laravel app. Sign up at Twilio and grab your account SID and Auth Token. Remember, with great power (to send texts) comes great responsibility (to not annoy people).
-
Nexmo SMS Account: If Twilio is James Bond, then Nexmo is Jane Bond! Same mission (sending texts), different accent. Sign up at Nexmo and get your API key and secret key.
-
Env File Configurations: This is like Laravel’s secret diary where it stores all the sensitive information (SID, Auth Token, API keys, etc.). You can find a sample one in
.env.example. Rename it to.envand fill it with your secrets.
Once you have these ingredients, you’re ready to send texts from Laravel like a pro! 🌐📱🚀
Sending Text Notifications 💬
Now that your app has its secret agent identity and a phone line, let’s send some texts! To do this, you’ll need to use Laravel’s built-in event broadcasting system. Here’s the general process:
-
Create an Event: This is like inviting guests to a party (your phone). In your application directory, create a new
Eventclass that extendsIlluminate\Broadcasting\PrivateSubscriber. Give it a name (e.g.,App\Events\TextMessageSent) and implement thehandlemethod. -
Fire the Event: When you want to send a text message, fire this event using Laravel’s event dispatcher. Here’s an example:
event(new TextMessageSent($recipient));-
Register the Listener: This is like setting up security at the party (your phone). In your
app/Providers/EventServiceProvider, register a new listener for your event using thelistenmethod. Make sure to import it first! -
Send the SMS: In your registered listener’s
handlemethod, use the SMS Notification Channel to send the text message:
$this->notify(new SmsNotification($message));And that’s it! Your Laravel app is now sending texts like a well-oiled machine. 🤖📱🎉
Configuration ⚙️
To configure your SMS Notification Channel, head to the config/notification directory and open the file named after your chosen provider (e.g., twilio.php or nexmo.php). Adjust settings like the from number, the message encoding, and more to tailor your text messages to perfection! 🎨📱✨
Happy Texting! 💬🚀🌐
Alright, buckle up, folks! It’s time to dive into the world of Laravel SMS notifications, powered by our pal Vonage (once known as Nexmo, but who’s keeping track, right?). Before we can start sending out those sweet, succinct messages, you need to install two essential packages:
laravel/vonage-notification-channel- the lifeblood of our SMS operation.guzzlehttp/guzzle- the trusty steed that carries our commands across the digital frontier.
You can grab them both with a single command:
composer require laravel/vonage-notification-channel guzzlehttp/guzzleThe package comes equipped with a configuration file, but fear not! You don’t have to export it like some ancient artifact. Instead, you can define your Vonage public and secret keys using the VONAGE_KEY and VONAGE_SECRET environment variables.
Once those keys are in place, don’t forget to set a VONAGE_SMS_FROM environment variable. This variable tells Laravel which number to use as your SMS sender, a number you can generate within the Vonage control panel (think of it as your digital cowboy alias).
VONAGE_SMS_FROM=15556666666Now that we’ve got the basics covered, let’s format those SMS notifications to make them look like they were crafted by a master wordsmith rather than a line of code. (Just kidding… sort of.) Head over to the next section to learn more! 🤠
Unleashing the Power of Textual Taunts via SMS Notifications! 📱🎉
Ahoy, coders! Ever wanted to send a snarky text message to your users, but didn’t know where to start? Fear not, for Laravel has got your back! 💫
If your notification can transform into an SMS missile, you’ve gotta create a toVonage method in the notification class. This magical method will receive a $notifiable entity and, with the grace of a ballet dancer, should return an Illuminate\Notifications\Messages\VonageMessage instance.
Use your best dance moves and...

use Illuminate\Notifications\Messages\VonageMessage;

/**
 * Get the Vonage / SMS representation of the notification.
 */
public function toVonage(object $notifiable): VonageMessage
{
    return (new VonageMessage)
        ->content('Your sassy SMS message content');
}
Now, if you’re feeling extra, you can even add some Unicode flair to your messages! Just remember, too many emojis may lead to a dance party no one asked for. 💃🕺️😉🤔🤪🤮
public function toVonage(object $notifiable): VonageMessage
{
    return (new VonageMessage)
        ->content('🎉 Yay! Your account has been activated! 🎉');
}
Enjoy your newfound power to send textual taunts that will leave users both entertained and informed! 🚀🌍🥳🤖👾💻🌈🎂🎁🎊🎈🌟🌠✨🌟🤩🎉💖💖💖💖💖💖💖💖💖💖💖💖💖💖💖💖💖💖💖💖💖💖💖💖💖💖💖💖💖💖💖
Ahoy there, matey! If ye be sendin’ a pirate’s treasure map with yer SMS messages (or any message with fancy schmancy unicode characters), ye need to let Vonage know about it! Here’s how you can do that in your Laravel application:
Use the finest notifications in the seven seas, me hearties! (use Illuminate\Notifications\Messages\VonageMessage;)

/**
 * Get the Vonage / SMS representation of the notification.
 */
public function toVonage(object $notifiable): VonageMessage
{
    return (new VonageMessage)
        ->content('Yer unicode message')
        ->dressUpInUnicode(); // Like a proper squire, ye are!
}
Arrrr, now that’s what I call an elegant solution to a nautical problem! 🏴☠️🎉🐙
But, let me tell ye about customizing the from number for yer messages too. Avast! ()
Use ye olde phone number as the sender of yer SMS (use Illuminate\Support\Facades\Vonage;)

/**
 * Send the notification via Vonage.
 */
public function send()
{
    $message = $this->toVonage($this->notifiable);
    $fromNumber = config('services.vonage.number'); // Find yer number, ye scallywag!
    Vonage::sendSms(
        $this->notifiable->phone_number,
        $message,
        [ 'from' => $fromNumber ]
    );
}
Now ye can send SMS messages like a true pirate! 🏴☠️📱🔫
Channeling Your Inner Forrest Gump: Customizing the “From” Shrimp Number! 🥙📱
Calling all telephonic chameleons! If you fancy sending notifications as if they were from a number that isn’t your trusted VONAGE_SMS_FROM environment variable sidekick, we gotcha covered! Simply call the from method on a VonageMessage instance like a true code maestro:
Use the Fone-A-Laravel notifications pack, son! 🎶

/**
 * Transform the Vonage / SMS notification into an actual, tangible object.
 */
public function toVonageShrimp(notifiable $notifiable): VonageMessage
{
    return (new VonageMessage)
        ->content('Your SMS message content')
        ->from('1555-444-3333'); // Replace with your secret shrimp number, Bubba! 🦐
}
P.S. Don’t forget to keep an eye out for Bubba Gump showing up in your SMS logs, or you might start believing that life is like a box of notifications! 🍤✨
Adding a Client’s Alias (A.K.A “Client-Fu”)
If you fancy yourself as a superhero of telecommunications, keeping tabs on your SMS expenses per user, team, or client might be as important as saving the world! Fear not, Laravel pal, for we’ve got a secret technique to unveil - “Client-Fu”!
Simply sprinkle some “Client-Fu” over your notifications, and Vonage will bestow upon you the power to generate reports like a Jedi Master. With this mystical client reference, you can dive deep into a specific customer’s SMS usage habits - making them as clear as a crystal ball!
This super-powered string can be up to 40 characters long:
use Illuminate\Notifications\Messages\VonageMessage;

/**
 * Get the Vonage / SMS representation of the notification.
 */
public function toVonage(object $notifiable): VonageMessage
{
    return (new VonageMessage)
        ->alias((string) $notifiable->id) // It's like saying "This is my client-fu!"
        ->content('Your SMS message content');
}
Remember, with great power comes great responsibility! Don’t get lost in the world of superheroes and forget to check out routing SMS notifications next! 🚀🌟
Channeling SMS Chatter: The Vonage Whisperer! 📞
Want to make sure those vital SMS notifications reach their destination like a homing pigeon? Well, grab your coding feathers and let’s craft a routeNotificationForVonage method for your notifiable entity.
<?php
namespace App\Models; // Don't forget your party hat! 🎉
class User extends Authenticatable // A user, not a robot...yet! 🤖
{
use Notifiable; // We're all about keeping notifications neat and tidy.
/**
* Channel Vonage notifications to the right number.
*/
public function routeNotificationForVonage(Notification $notification): string // Here's where the magic happens! 🎩
{
return $this->phone_number; // The secret phone number of our SMS VIP! 🕵️♂️
}
}Phew, that’s one less mystery to solve! Now you’re the Vonage Whisperer, guiding those notifications through the wild west of the web straight to their intended recipient. 🌵🤠 Keep up the good work!
Slackin’ in Style! 🎉
Ready to turn your Laravel app into a party chatbot? Great! Let’s get this bot-tle poppin’! 🍾
Prerequisites 🛠️
Before we dive into the dance floor, make sure you’ve got these prerequisites in place:
-
Slack API Token: Obtain a token from your friendly neighborhood Slack admin. It’s like your secret password to Slack’s inner circle. 🕵️♂️🔑
-
Laravel 5.5+: You’ll need a Laravel installation that’s at least as cool as the Backstreet Boys (that’s 5.5 or higher, for you math whizzes out there). 🎶🕺️
-
Composer: Because who doesn’t love a good game of mix-and-match with packages? 🧩📦
Installation 🚀
With your prerequisites in check, it’s time to install the Slack package:
composer require laravel/slackNow, give your Laravel app a big hug and tell it you just got even cooler! 🤗🌟
Configuration 📋
To get Slack on the same page as your Laravel app, follow these steps:
-
Publish the Slack service provider using this command:
php artisan vendor:publish --provider="Laravel\\Slack\\SlackServiceProvider" -
Update your
app/Providers/AppServiceProvider.phpfile to include the Slack facade:use Laravel\Slack\Facades\Slack; -
Set your Slack API token as an environment variable:
export SLACK_API_TOKEN=<your-token> -
Now, you’re ready to rock! Let’s send a test message to the Slack channel:
Slack::webhook('<slack-webhook-url>')->post('Hello from Laravel!');
Notifications 🔔
With the basics down, you can now create notifications to keep your Slack friends in the loop. Here’s a simple example:
class UserRegisteredNotification extends Notification
{
    // ...

    public function toSlack($notifiable)
    {
        $user = $notifiable->routeNotificationForSlack();

        Slack::webhook('<slack-webhook-url>')
             ->attachments([[
                 'color' => '#36a64f',
                 'fields' => [
                     ['name' => 'Username', 'value' => $user->username],
                     ['name' => 'Email', 'value' => $user->email],
                 ],
             ]])
             ->post('A new user has registered!');
    }
}
And that’s a wrap! Now you can keep your Slack channel buzzing with Laravel notifications. 🐝📣🎉
Alright, buckle up, Laravel enthusiasts! Let’s embark on a fun-filled journey of sending Slack notifications. But before we start our digital carnival, there are a few prerequisites you should check off your list.
First things first, let’s invite the Slack notification channel to the party via Composer. It’s like asking a cool friend to join your band—you just need to issue this command:
composer require laravel/slack-notification-channelNext, it’s time to create a Slack App for your workspace. Think of it as the swanky poster of your band that attracts fans (or in this case, notifications). You can find the tool to create this masterpiece at https://api.slack.com/apps?new_app=1
Now, if you’re planning to send notifications only to the same Slack workspace where the App was created, it’s important to make sure your App has the necessary scopes: chat:write, chat:write.public, and chat:write.customize. It’s like getting a backstage pass for your favorite concert! You can add these scopes from the “OAuth & Permissions” tab within Slack.
Next up, grab the App’s “Bot User OAuth Token.” This is the magic key that lets our Laravel app communicate with your Slack App. Find this token on the “OAuth & Permissions” tab within Slack and place it securely within a slack configuration array in your application’s services.php configuration file:
'slack' => [
    'notifications' => [
        'bot_user_oauth_token' => env('SLACK_BOT_USER_OAUTH_TOKEN'), // Replace with your token, obtained from Slack!
        'channel' => env('SLACK_BOT_USER_DEFAULT_CHANNEL'),
    ],
],
And there you have it! You’ve set up the stage for sending Slack notifications like a rockstar. Next time, we’ll learn how to write some awesome code to actually send those notifications. Stay tuned!
Alrighty, let’s get this bot party started! 🤖🥳
If you’re planning to send notifications to Slack workspaces owned by your app’s coolest users, it’s time to suit up and “distribute” your App like a boss. Don’t worry, Slack’s got the distribution center, and you can access it from your App’s “Manage Distribution” tab - think of it as the VIP section for apps. 🏢✨
Once your App is out on the dance floor (distributed), you can use the swanky Socialite to grab those Slack Bot tokens your users will be fighting over. You know, like how people fight for gold stars in kindergarten. But with tokens! 💰🎉
Now, let’s talk about formatting those notifications. Because who doesn’t love a good dance routine? Just follow the Socialite guidelines and watch your notifications transform into the life of the party! 🎵💃
Remember, it’s all about making a good impression. After all, you want those users to keep inviting your App to their Slack workspaces (and parties). So let’s get this bot-tastic distribution sorted and have these notifications poppin’ off! 🥳🎉
Ahoy there, Laravel Captain! Fancy formatting your Slack notifications like a digital pirate, eh? Well, buckle up, matey! To set sail on this adventure, you’ll need to define a toSlack method on your notification class. This method will be swabbing the deck with a $notifiable entity and returning an Illuminate\Notifications\Slack\SlackMessage instance, like a seasoned sea dog!
Now, let’s arm our ship with the treasure chest of Slack’s Block Kit API ([arr]treasure chest [/arr]) at https://api.slack.com/block-kit. Yarrr! With this loot, you can construct notifications so rich they’d make Captain Jack Sparrow green with envy!
Here’s an example of a fully decked-out notification that’ll surely impress the shipmates:
use Illuminate\Notifications\Slack\BlockKit\Blocks\ContextBlock;
use Illuminate\Notifications\Slack\BlockKit\Blocks\SectionBlock;
use Illuminate\Notifications\Slack\SlackMessage;

/**
 * Get the Slack representation of the notification.
 */
public function toSlack(object $notifiable): SlackMessage
{
    return (new SlackMessage)
        ->text('Avast, me hearties! One of yer invoices has been paid!') // 📢 Announcement cannon fired!
        ->headerBlock('Invoice Paid', 'Arrr, ye'll never guess who paid it!') // 🏆 Flag raised for celebration
        ->contextBlock(function (ContextBlock $block) {
            $block->text('Customer #1234');
        }) // 🛍️ Bold and proud, we shout out our customer number!
        ->sectionBlock(function (SectionBlock $block) {
            $block->text('An invoice has been paid.'); // 💰 Purse heavy with coins!
            $block->field("*Invoice No:*\n1000")->markdown(); // 📝 Invoice details parchment unfurled!
            $block->field("*Invoice Recipient:*\n[email protected]")->markdown(); // 📧 Letter sent to recipient!
        })
        ->dividerBlock() // 🔚 Curtains closed, time for some privacy!
        ->sectionBlock(function (SectionBlock $block) {
            $block->text('Congratulations!'); // 🎉 Fireworks bursting in the night sky!
        });
}
Arrr, you’re well on your way to sending notifications that make even Davy Jones green with envy! For more help in creating notifications using Slack’s Block Kit Builder template, check out https://app.slack.com/block-kit-builder/T01KWS6K23Z#%7B%22blocks%22:%5B%7B%22type%22:%22header%22,%22text%22:%7B%22type%22:%22plain_text%22,%22text%22:%22Invoice%20Paid%22%7D%7D,%7B%22type%22:%22context%22,%22elements%22:%5B%7B%22type%22:%22plain_text%22,%22text%22:%22Customer%20%231234%22%7D%5D%7D,%7B%22type%22:%22section%22,%22text%22:%7B%22type%22:%22plain_text%22,%22text%22:%22An%20invoice%20has%20been%20paid.%22%7D,%22fields%22:%5B%7B%22type%22:%22mrkdwn%22,%22text%22:%22*Invoice%20No:*%5Cn1000%22%7D,%7B%22type%22:%22mrkdwn%22,%22text%22:%22*Invoice%20Recipient:*%[email protected]%22%7D%5D%7D,%7B%22type%22:%22divider%22%7D,%7B%22type%22:%22section%22,%22text%22:%7B%22type%22:%22plain_text%22,%22text%22:%22Congratulations!%22%7D%7D%5D%7D
Aye aye, captain. May your notifications always be bold and pirate-y! 🏴☠️🌺
Alrighty, let’s dive into the world of Slack messaging, where conversations are as important as your favorite cup of joe! Instead of building your Block Kit message like a poet crafts a sonnet, you can serve it raw, straight from the oven of Slack’s Block Kit Builder.
Use this script when you're too busy coding to write like Shakespeare:

import Illuminate\Notifications\Slack\SlackMessage;
import Illuminate\Support\Str;

Want to make Slack messages that are as fancy as a 17th-century ballroom? Check out this code:

public function toSlack(object $notifiable): SlackMessage
{
    $template = <<<JSON
        {
          "blocks": [
            {
              "type": "header",
              "text": {
                "type": "plain_text",
                "text": "Team Announcement"
              }
            },
            {
              "type": "section",
              "text": {
                "type": "plain_text",
                "text": "We are hiring!"
              }
            }
          ]
        }
    JSON;

    return (new SlackMessage)
        ->usingBlockKitTemplate($template);
}
Now that’s what I call a messaging masterpiece! 🎨💼🚀
The Slapstick of Slack Interactivity!
Get ready for a tickle-tickle dance with Slack’s Block Kit notification system, the party-starter for power users and apps alike! This magical contraption grants you superpowers to manage user interactions with finesse and flair.
First things first, make sure your Slack App is dressed to the nines in “Interactivity” and decked out with a “Request URL” that points to your application’s swankiest ballroom. You can find these settings under the “Interactivity & Shortcuts” tab within Slack—it’s like the VIP room of app management!
Now, let’s strut our stuff with an example using the actionsBlock method:
use Illuminate\Notifications\Slack\BlockKit\Blocks as BlockKitBlocks;
use Illuminate\Notifications\Slack\SlackMessage;

/**
 * Get the Slack representation of the notification.
 */
public function toSlack(object $notifiable): SlackMessage
{
    return (new SlackMessage)
        ->text('Congrats! You just hit the jackpot with that invoice!')
        ->headerBlock('Invoice Paid', BlockKitBlocks::CONTEXTUAL_ACTIONS) // Hail to the King, baby!
        ->contextBlock(function (ContextBlock $block) {
            $block->text('King #1234');
        })
        ->sectionBlock(function (SectionBlock $block) {
            $block->text('You've just received a payment for an invoice.');
        })
        ->actionsBlock(function (ActionsBlock $block) {
             // The default ID is "button_acknowledge_invoice", but you can always change it...
            $block->button('Acknowledge Invoice')->primary()->id('acknowledge');

            // Go custom!
            $block->button('Deny with a Dash of Drama')->danger()->id('deny_with_flair');
        });
}
Now, don’t forget to verify the request is indeed from Slack—otherwise you might be dancing with a stranger!
Next up: Slack Confirmation Modals, where the real party starts!
Alright, here’s a fun take on your Laravel Confirmation Modals docs! Buckle up for some codey comedy.
Hey there, Action Aficionados! 🎉🎢
Ever wanted to make sure your users are absolutely committed before they unleash a destructive action? Fear not, because Laravel has got your back with its trusty confirm method! Just like asking for that second drink when you’re already tipsy, but with way fewer regrets.
use Illuminate\Notifications\Slack\BlockKit\Blocks as SlackBlocks; // Feel free to call it "The Drink Menu"
use Illuminate\Notifications\Slack\SlackMessage;                  // Let's rename this one to "BartenderBot" for added flair

/**
 * Serve the user their Laravel Slack notification cocktail.
 */
public function serveCocktail(object $notifiable): SlackMessage
{
    return (new SlackMessage)
        ->greet('Hey there!')                 // Start with a friendly hello, because who doesn't love a good opener?
        ->title('Invoice Paid! 💸🎉')          // A little celebration never hurt anyone
        ->headerBlock(new SlackBlocks\ContextBlock('Customer #1234')) // Gather round folks, here's our VIP for the night
        ->sectionBlock(new SlackBlocks\SectionBlock('Invoice Alert!'))   // Breaking news: An invoice has been paid!
        ->actionBlock(function (SlackBlocks\ActionsBlock $block) {  // Time to make a decision, folks
            $block->button('Acknowledge Invoice')
                ->primary()                     // Make it stand out, this is important stuff!
                ->confirm(
                    'Shall we send a thank-you email for the payment?',   // Ask the tough questions, remember?
                    function (ConfirmObject $dialog) {
                        $dialog->confirm('Yes');                         // If they say yes, pour that drink!
                        $dialog->deny('No');                           // But if not, let's stick to water for now.
                    }
                );
        });
}
And there you have it! Now your users will be well and truly sloshed with confirmation before they commit to any action in your Laravel app. Cheers! 🍻
Ahoy there, code wranglers! 🤠🌟
If you’ve been building Slack blocks like a pro and want to take a peek at your masterpiece before unleashing it on the interwebs, fear not! You can summon the mighty dd method on the noble SlackMessage instance. This magical incantation will conjure up a URL pointing to Slack’s Block Kit Builder, where you can view a sneak peek of your payload and notification in all its glory.
Now, if you’re feeling fancy, pass along true to the dd method and it’ll dump the raw payload for you like a skilled bartender mixing up your favorite cocktail. 🍹
return (new SlackMessage)
    ->text('One of your invoices has been PAID!')
    ->headerBlock('Invoice Paid')
    ->dd(true);
Just remember, with great power comes great responsibility. Don’t make us clean up after you. 😉
Sending Slack’s Secret Stuff to the Right Place 🕵️♀️📫
Want your Slack notifications to find their way to the right team and channel like a homing pigeon? All you need is to whip up a routeNotificationForSlack method on your supermodel! This nifty function can return one of three secret decoder ring values:
null- which lets the notification loose in the channel it’s already dressed for. You can use thetomethod when tailoring yourSlackMessageto select a channel within the notification itself.- A string that points to the Slack channel you want to hit, like
#support-channel. - A fancy
SlackRouteinstance, which lets you specify a top-secret OAuth token and channel name, akin toSlackRoute::make($this->slack_channel, $this->slack_token). Use this when you’re sending notifications to remote Slack workspaces.
So, if you return #support-channel from the routeNotificationForSlack method, the notification will zip off to the #support-channel in the workspace connected to the Bot User OAuth token stashed away in your application’s services.php configuration file:
<?php

namespace App\Models;

use Illuminate\Foundation\Auth\User as Authenticatable;
use Illuminate\Notifications\Notifiable;
use Illuminate\Notifications\Notification;

class User extends Authenticatable
{
    use Notifiable;

    /**
     * Send your notifications on a wild goose chase.
     */
    public function routeNotificationForSlack(Notification $notification): mixed
    {
        return '#support-channel';
    }
}
Now, you can share your secrets with the world… or just your team 😉
Let’s Chat with Slack! 💬💭
Spilling the Beans to External Slack Digs 🏢👩💻
[📝 PSA] Before we start sending notifications to our new Slack pals, your Slack App needs to be out in the wild (more on that here).
Now, you might find yourself hankering to send notifications to the Slack digs owned by your application’s peeps. To make that happen, you’ll first need a shiny new OAuth token for each user. Lucky for us, Laravel Socialite comes complete with a Slack driver ready to authenticate our app users with Slack and grab a bot token (details here).
With the bot token safely stashed in your app’s treasure chest (a.k.a., the database), you can utilize the SlackRoute::make method to beam notifications straight to the user’s workspace. And if you want to offer the option for users to specify their channel, you can do something like this:
<?php

namespace App\Models;

use Illuminate\Foundation\Auth\User as Authenticatable;
use Illuminate\Notifications\Notifiable;
use Illuminate\Notifications\Notification;
use Illuminate\Notifications\Slack\SlackRoute;

class User extends Authenticatable
{
    use Notifiable;

    /**
     * Route notifications for the Slack channel.
     */
    public function routeNotificationForSlack(Notification $notification): mixed
    {
        return SlackRoute::make($this->slack_channel, $this->slack_token);
    }
}
Translating Notifications (optional) 🌐🌍️
Want to make your notifications speak fluent French, Spanish, or even Klingon? You can! Just make sure you have the language line files in your project and use the availableOn method when defining your routes. Happy chatting, adventurers! 🚀🌟
Internationalizing those Notifications! 🌐
Ready to conquer the globe with your notifications? Fear not, Laravel’s here to help! This magical unicorn of a framework allows you to spew notifications in languages other than the one currently serving cocktails at your HTTP request bar. It’s like a polyglot bartender that never forgets its customers’ preferred lingo, even when it’s time for happy hour and the queue gets rowdy! 🍹
To make this happen, dive into the Illuminate\Notifications\Notification class, where you’ll find the locale method—your secret weapon to setting the desired language like a pro linguist. Once the notifications start dancing the salsa, the application will switch into your chosen locale and then gracefully return to its original linguistic abode once the fiesta is over:
$user->notify((new InvoicePaid($invoice))->locale('es'));But wait, there’s more! If you’ve got a whole troop of notifiable users who need their notifications in Spanish, the Notification facade will swoop in and save the day:
Notification::locale('es')->send(
    $users, new InvoicePaid($invoice)
);
Now, you might be wondering: “What if my users have their own preferred locales?” Well, don’t you worry—Laravel keeps track of everyone’s linguistic preferences like a boss. Each user’s locale will be considered when sending notifications, ensuring that everyone receives their notifications in the language they prefer! 🤫
So go ahead, conquer the world with your multilingual notifications, and remember: when it comes to Laravel, the sky is not just blue—it’s a rainbow of possibilities! 🎉🌈
Ahoy there! Let’s embark on a linguistic journey with Laravel, shall we? You know when Captain Cook wanted to send a message to the natives but didn’t want to risk getting lost in translation? Well, that’s where our trusty HasLocalePreference contract comes into play!
This dashing contract, my dear friends, allows your notifiable model (think it’s like Jack Sparrow, but without the parrot) to store a user’s preferred language. To ensure smooth sailing, simply drape your Model in this contract:
use Illuminate\Contracts\Translation\HasLocalePreference;

class User extends Model {
    // Think of it as Captain Jack's treasure map with a language instead of gold!
    public function preferredLanguage(): string {
        return $this->language_of_choice;
    }
}
Once you’ve hoisted the Jolly Roger of this interface, Laravel will start using the pirate’s preferred language when sending notifications and mailables to the model. No need for Captain Jack to call “Yo ho ho, speak my language!” every time now:
$pirate->get_mail_or_notification($invoice);Remember, if you’re testing, ye might want to set up your preferred language for each user in the database, like marking ‘X’ on a treasure map. Arrrr! Happy sailing! 🦈🌴🚀
Alright, buckle up, coding cowboys and codelettes! Let’s dive into the wild west of Laravel notifications. You can hitch a ride on the Notification facade’s fake method to avoid unwanted notifications galloping off into the sunset. Sending notifications is usually a sidekick to the main event - your actual code. Most times, it’s just about making sure Laravel heard the right orders, no need for the actual delivery.
Once you’ve saddled up with Notification::fake(), you can then check if notifications were lined up for a ride, and even peek at their payload:
<?php

Use Y'all\Notifications\OrderShipped; // You know, just like in the saloon!
use Illuminate\Support\Facades\Notification;

test('orders can be shipped', function () {
    Notification::fake();

    // Perform order shipping, pardner!

    // Assert that no notifications were sent...
    Notification::assertNothingSent();

    // Assert a notification was sent to ol' $user...
    Notification::assertSentTo(
        [$user], OrderShipped::class
    );

    // Assert a notification wasn't sent to no one! (AnotherNotification)
    Notification::assertNotSentTo(
        [$user], AnotherNotification::class
    );

    // Assert that WeeklyReminder was sent twice...
    Notification::assertSentTimes(WeeklyReminder::class, 2);

    // Assert that a given number of notifications were sent... (Count 'em up!)
    Notification::assertCount(3);
});<?php
namespace Tests\Feature;
Use Y'all\Notifications\OrderShipped; // You know, just like in the saloon!
use Illuminate\Support\Facades\Notification;
use Tests\TestCase;
class ExampleTest extends TestCase
{
public function test_orders_can_be_shipped(): void
{
Notification::fake();
// Perform order shipping, pardner!
// Assert that no notifications were sent...
Notification::assertNothingSent();
// Assert a notification was sent to ol' $user...
Notification::assertSentTo(
[$user], OrderShipped::class
);
// Assert a notification wasn't sent to no one! (AnotherNotification)
Notification::assertNotSentTo(
[$user], AnotherNotification::class
);
// Assert that WeeklyReminder was sent twice...
Notification::assertSentTimes(WeeklyReminder::class, 2);
// Assert that a given number of notifications were sent... (Count 'em up!)
Notification::assertCount(3);
}
}You can rope in closures to the assertSentTo or assertNotSentTo methods, letting you check if a notification fits your criteria - like an old-west gold panner. If at least one notification matches up with your criteria, the assertion wins:
Notification::assertSentTo(
    $user,
    function (OrderShipped $notification, array $channels) use ($order) {
        return $notification->order->id === $order->id;
    }
);
Hope this lassoed up your Laravel testing knowledge a bit! Happy coding! 🤠🚀
Alrighty, let’s chat about Laravel’s On-Demand Notifications! You know, those little digital pigeons that fly off when your code says “Hey, send a message!”
So, if you’ve got some test code sending on-demand notifications (like a pigeon courier gone rogue), you can make sure it delivered by using the assertSentOnDemand method. Just drop this into your test:
Notification::assertSentOnDemand(OrderShipped::class);Now, if you want to ensure that your on-demand notification went to the right recipient (like verifying a pigeon flew to the correct castle), pass a closure as the second argument:
Notification::assertSentOnDemand(
    OrderShipped::class,
    function (OrderShipped $notification, array $channels, object $notifiable) use ($user) {
        return $notifiable->routes['mail'] === $user->email;
    }
);
Oh, and don’t forget to check out the Notification Events, because knowing when and where your pigeons are flying is crucial for maintaining good relations with the kingdom!
The Big ol’ Razzmatazz of Notification Events! 🎺🎉
Ahoy there, coder pal! Dive into the whirlwind world of Laravel Notification Events, where sending notifications has never been more thrilling! 🌪️🚀
The Star-Spangled Sending Event 🇺🇸🎵
Ever wanted to throw a party and invite everyone in your app? Introducing the Notification Sending Event! This event gets triggered whenever you send a notification, allowing you to celebrate each dispatch like it’s the Fourth of July!
Remember to decorate your app with all the confetti and balloons you need. Just don’t forget to clean up after the celebration—unless you enjoy programming with a side of glitter. 💃✨
Now that we’ve set the mood, let’s get down to business! To listen for the Notification Sending Event, create an event listener using Laravel’s built-in make:listener command. Then, within your listener class, implement the Notifiable interface and provide a method called onNotificationSent.
// Register your event listener
php artisan make:listener NotificationSendingListener

// In the listener file
namespace App\Listeners;

use Illuminate\Contracts\Queue\ShouldQueue;
use Illuminate\Notifications\Events\NotificationSent;
use Illuminate\Support\Facades\Log;

class NotificationSendingListener implements ShouldQueue
{
    /**
     * Create the event listener.
     */
    public function __construct()
    {
        //
    }

    /**
     * Handle the event.
     *
     * @param  NotificationSent  $event
     * @return void
     */
    public function handle(NotificationSent $event)
    {
        Log::info("A notification has been sent!");
    }
}
And just like that, you’ve got yourself a party animal of an event listener! 🦁🎉 Now every time you send a notification, your app will log a little dance party message in the logs.
Let’s get this party started! 🎉🥳
Alrighty, let’s dive into the ticklish world of Laravel notifications!
The Jolly Good Notification Sending Event
When a notification decides to take its leave (or “send” as we call it in tech), the Illuminate\Notifications\Events\NotificationSending event is like a party invite, hurled into the air by the notification system. This event comes complete with the “notifiable” entity and the actual notification instance. You can throw your own party for this event within your application:
use Illuminate\Notifications\Events\NotificationSending;

class CheckIfNotifIsAWildOne {
    /**
     * Handle the event.
     */
    public function handle(NotificationSending $event): void {
        // ...
    }
}
Now, if your party guest (the NotificationSending event) decides to be a wallflower and return false from its handle method, the notification will be left twirling on the dance floor like a sad trombone.
/**
 * Handle the event.
 */
public function handle(NotificationSending $event): bool {
    return false;
}
Once you’ve got your party going, you can access the notifiable, notification, and channel properties on the event to learn more about who’s being serenaded or the notification itself:
/**
 * Handle the event.
 */
public function handle(NotificationSending $event): void {
    // $event->channel - What is the delivery method? Telegram, email, or smoke signals?
    // $event->notifiable - Who's getting this delightful message? The user, the cat, or the plant?
    // $event->notification - Is it a birthday greeting, password reset, or a pizza delivery reminder?
}
Now go on, party like it’s 1999 (or at least like it’s Laravel)!
Alrighty, buckle up, coders! Let’s dive into the world of notifications and see what tickles our funny bone in this Laravel doc.
The Showtime for Notification Sent Event! 📣🎉
Ever wondered what happens when you hit ‘send’ on a notification? Well, grab some popcorn, because the Illuminate\Notifications\Events\NotificationSent event goes off like a firework show in Vegas! This bad boy is dispatched by the notification system whenever your message gets launched into the digital stratosphere. It brings along the “notifiable” entity and the notification instance itself, just like a friendly pair of sidekicks on a superhero mission! 🦸♂️🦸♀️
So, you’re probably thinking: “Alright, but how do I catch this event in my app?” Well, dear friend, all you need to do is create some event listeners! Here’s a super simple example:
use Illuminate\Notifications\Events\NotificationSent;

class LogNotification
{
    /**
     * Handle the event.
     */
    public function handle(NotificationSent $event): void
    {
        // ...
    }
}
Now that you’ve got your event listener all set, let’s see what juicy details we can access within it! You can get your hands on the notifiable, notification, channel, and response properties on the event. These will give you an inside scoop on the notification recipient or the notification itself:
/**
 * Handle the event.
 */
public function handle(NotificationSent $event): void
{
    // $event->channel - The delivery guy delivering your message 🚪
    // $event->notifiable - The lucky recipient of your message 🎉
    // $event->notification - The actual content of the message you're sending 📋
    // $event->response - How the notification responded to being sent, aka whether it made it or not 🎯
}
And don’t forget to check out custom channels if you fancy dressing up your delivery guy in a tuxedo and adding some confetti to your popcorn! 🤵🎊🎉
Custom Cacophonies! 🎺📣
Ahoy there, Laravel enthusiasts! While we come with a stockpile of caw-tactic notification channels, the world is vast, and sometimes you’ll want to pipe up via other conduits. Well buckle up, buttercup! With Laravel, it’s as easy as pie (or maybe pizza, if you prefer).
First, whip up a class with a send method that takes two guests: a $notifiable and a $notification. Inside the send method, you can call methods on the notification to fetch a message object suitable for your channel. Then, unleash the notification upon the $notifiable instance in whatever harebrained way tickles your fancy:
<?php

namespace App\Notifications;

use Illuminate\Notifications\Notification;

class BellRinger
{
    /**
     * Toss the given notification.
     */
    public function ring(object $notifiable, Notification $notification): void
    {
        $bell_toll = $notification->toBell($notifiable);

        // Ring that bell on the $notifiable instance...
    }
}
Once your custom notification channel class is hatched, you can return the class name from the via method of any of your notifications. In this example, the toBell method of your notification could return whatever object you fancy to represent bell-related tidings. Why not concoct a swanky BellToll class for the occasion?
<?php

namespace App\Notifications;

use App\Notifications\Messages\BellToll;
use App\Notifications\BellRinger;
use Illuminate\Bus\Queueable;
use Illuminate\Contracts\Queue\ShouldQueue;
use Illuminate\Notifications\Notification;

class InvoicePaid extends Notification
{
    use Queueable;

    /**
     * Get the notification channels.
     */
    public function via(object $notifiable): string
    {
        return BellRinger::class;
    }

    /**
     * Get the bell representation of the notification.
     */
    public function toBell(object $notifiable): BellToll
    {
        // ...
    }
}
Now, let’s get those notifications ringing out! 🔔🎺💪🏼